Overview
A customer is needed to generate a Sales Order. If a customer contacts you for a Sales Order, Quote, or you just want to add them as a Lead, the system allows you add a customer quickly and easy to your database.
Adding a New Customer
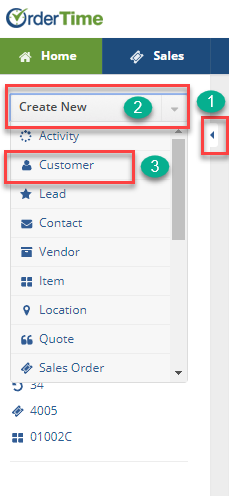
- To add a customer, click on the side menu.
- Select Create New.
- Select Customer from the drop down menu.
Complete the following information under each of the sections below:
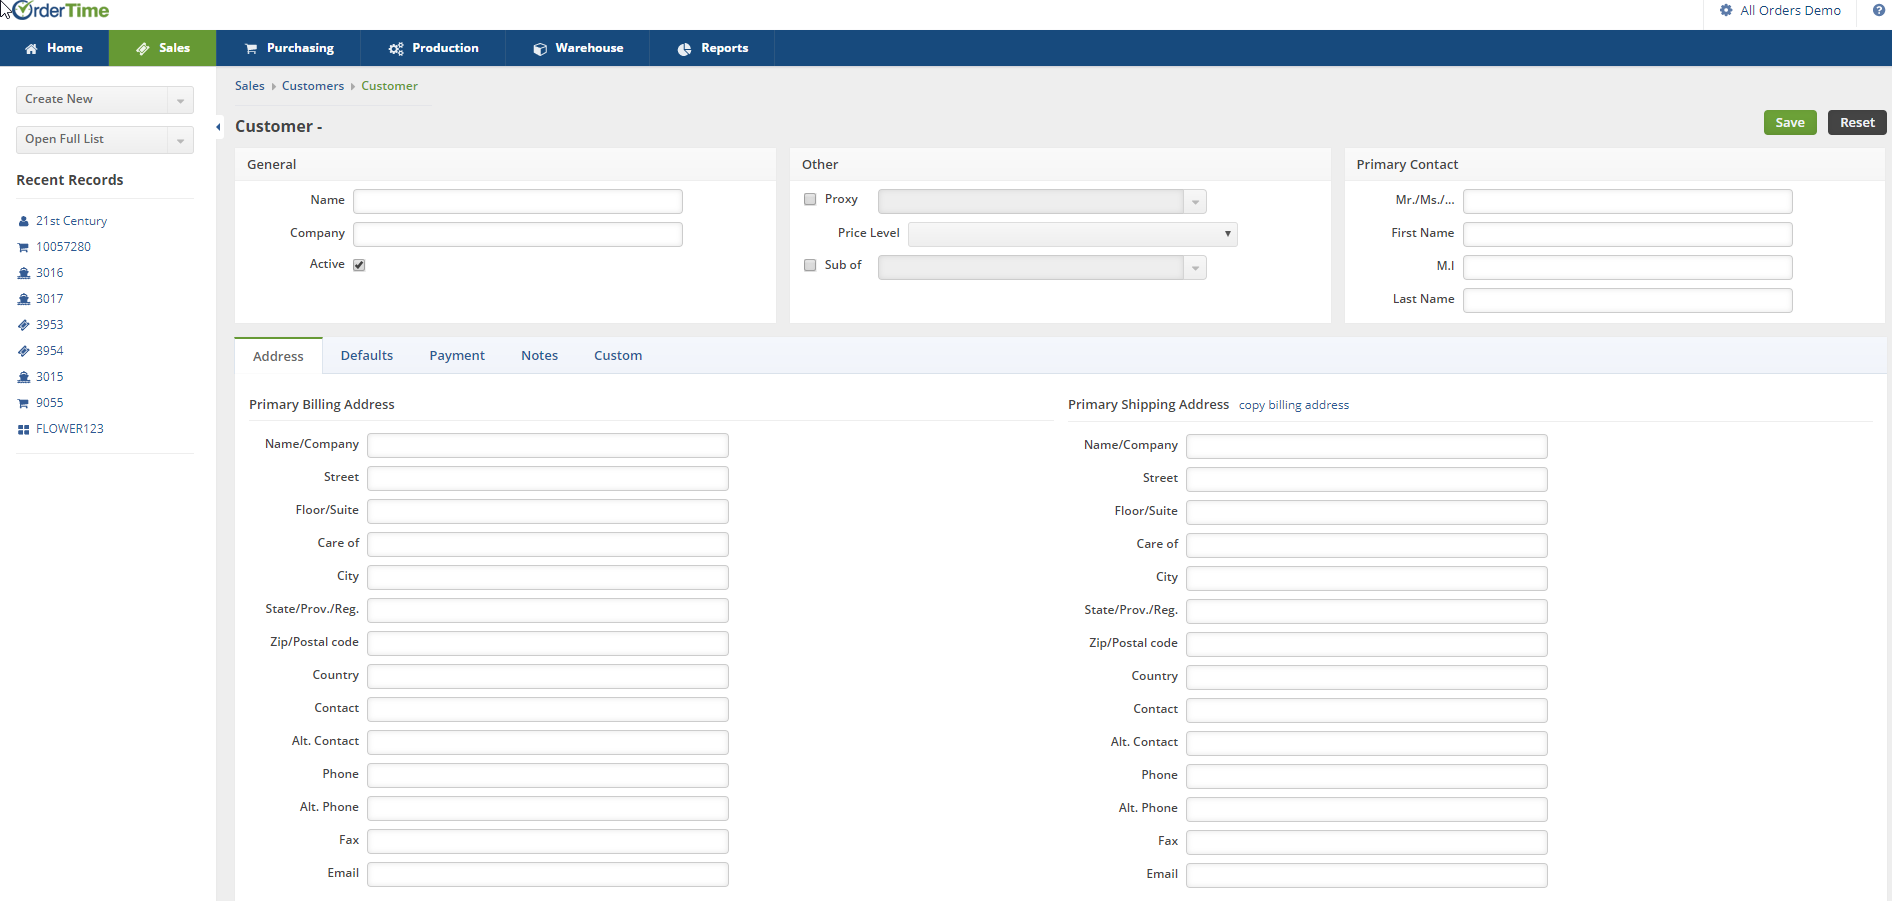
General
- Enter Customer's Name. This will be the name represented on all the customer's invoices.
- Enter Company's Name.
- Select the Lead Status from the drop down menu. The Lead Status will point out the Customer's Lead progress (i.e. Discussion, Prospecting).
Other
- If the customer has a proxy, check the Proxy* box and select the proxy customer.
- Use the drop down menu to select the Price Level.
Primary Contact
- Enter the appropriate prefix: Mr., Mrs. or Ms.
- Type the Primary Contact First Name.
- Type Middle Initial (M.I.).
- Type Primary Contact Last Name.
Enter Customer information on each tab:
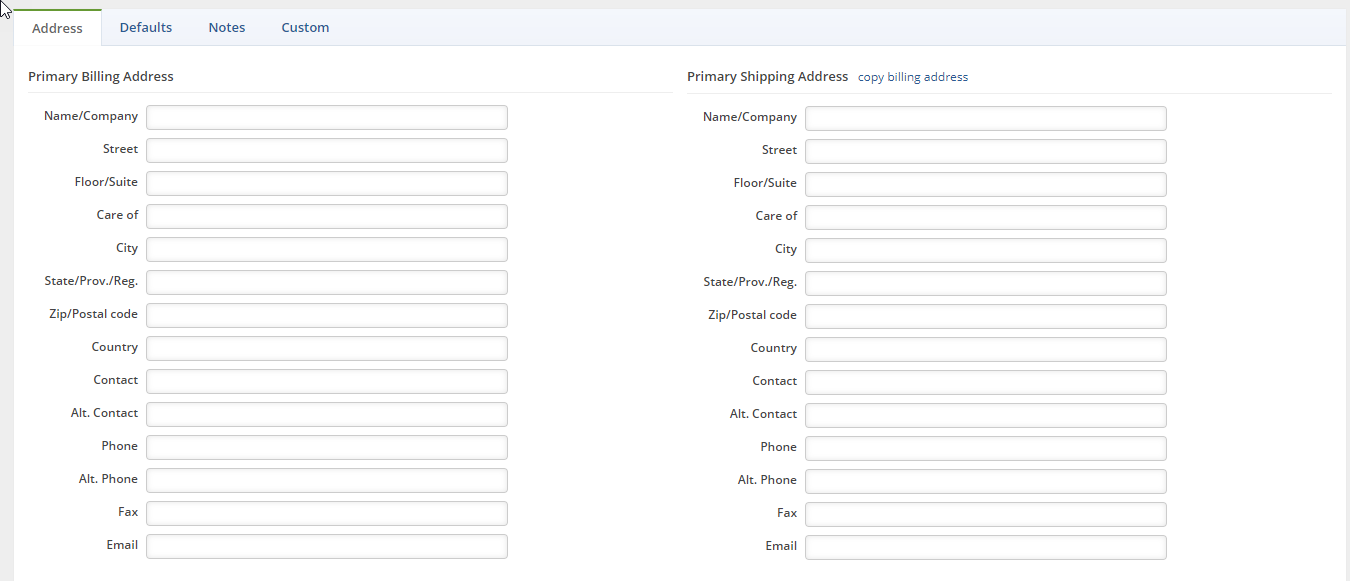
Address
Under the Address tab, enter the Primary Billing Address and Primary Shipping Address.
Remember this information will be used to create your customer database, it is essential the information is as accurate as possible. The system also allows you to edit the information at any time during the sales process.
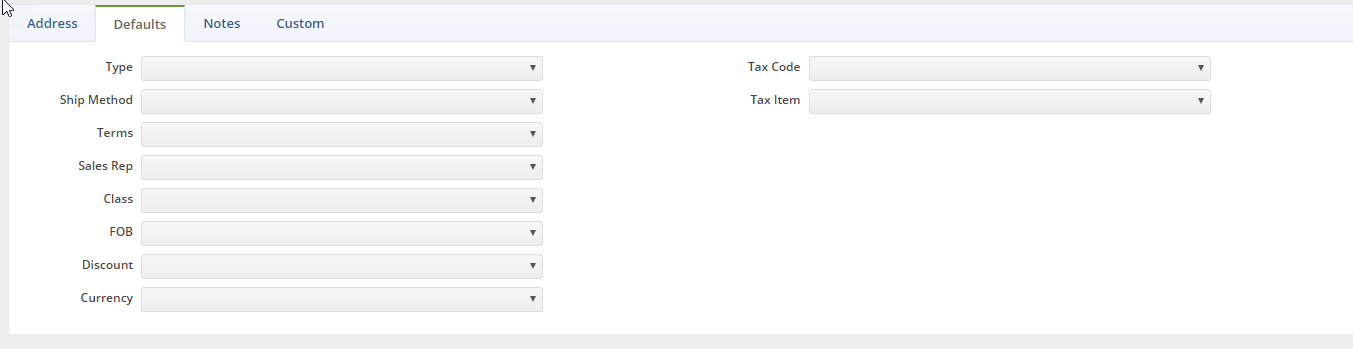
Defaults tab
Under the Defaults tab, specify the customer shipping preferences, payment terms; select the sales rep working on the lead, FOB shipping point, discounts associated with the customer, customer's tax code and tax item to identify tax location.
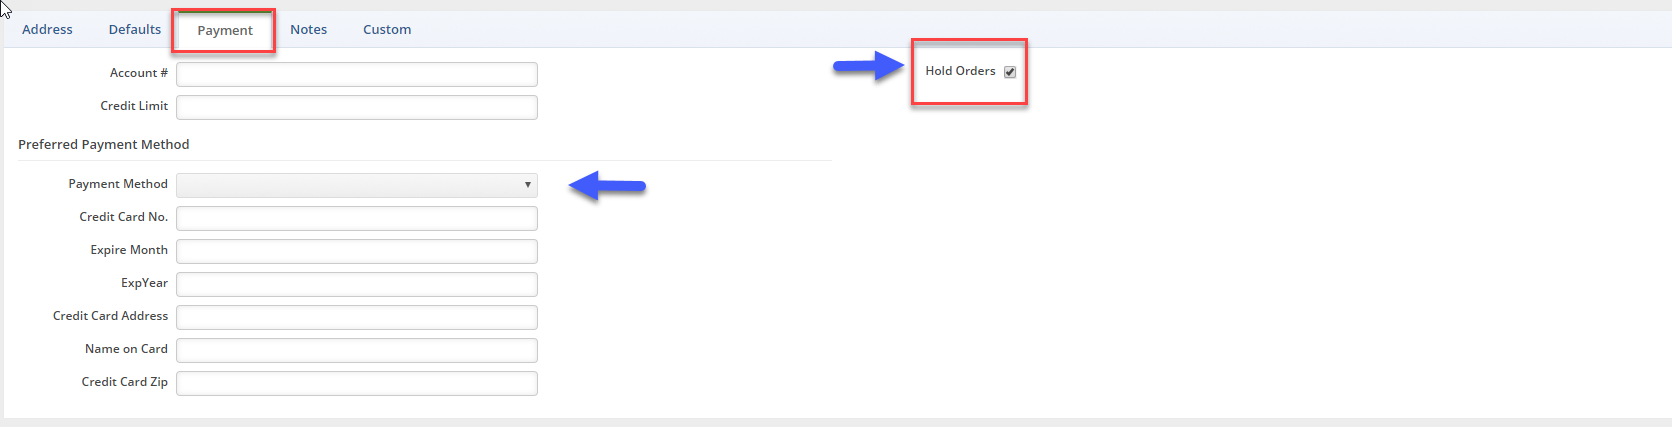
Payment
Under the Payment tab, set up your customer's payment parameters. This will be an important section that will need special attention for it will affect all aspect of your sales payment structure.The following parameters can be set for your customer under the Payment tab:
- Account Number
- Credit Limit
- Credit Card No Information (i.e. Expiration Date, Credit Card Address, Name on Card, Credit Card Zip)
You also have an option to Hold Order feature for all the orders generated for that customer.
Notes
Under the Notes tab, type relevant information to your customer's account.
Customs
Under the Custom tab, you can build/customize additional customer information. These fields can be activated to ensure they are required.

*Proxy set up
For customers, vendors and items, Order Time allows you to use 'Proxies' (a.k.a Aliases). A proxy is a record in Accounting that will be used by Order Time to record a transaction. For example, you have a website but you do not want to create every customer in Accounting. You first set up a customer called 'Web Customer' which is in both Accounting and Order Time. When you create a new customer in Order Time, you select 'Web Customer' in the Proxy drop down. When an invoice is generated in Accounting, you will not see the name of the customer but rather 'Web Customer'. The same approach can be taken with items and vendors.
Select Save when the information and parameters have been entered in the customer screen.
Now that the Customer has been entered, you can begin to process customer by creating New Sales Orders, Quotes, etc.
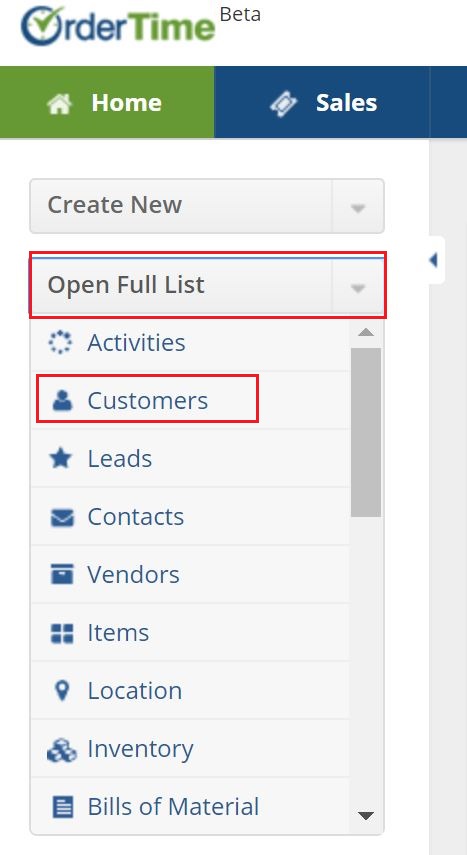
- To create a New Sales Order, click on the side menu and select Open Full List.
- Form the Open Full List drop down menu, select Customers.
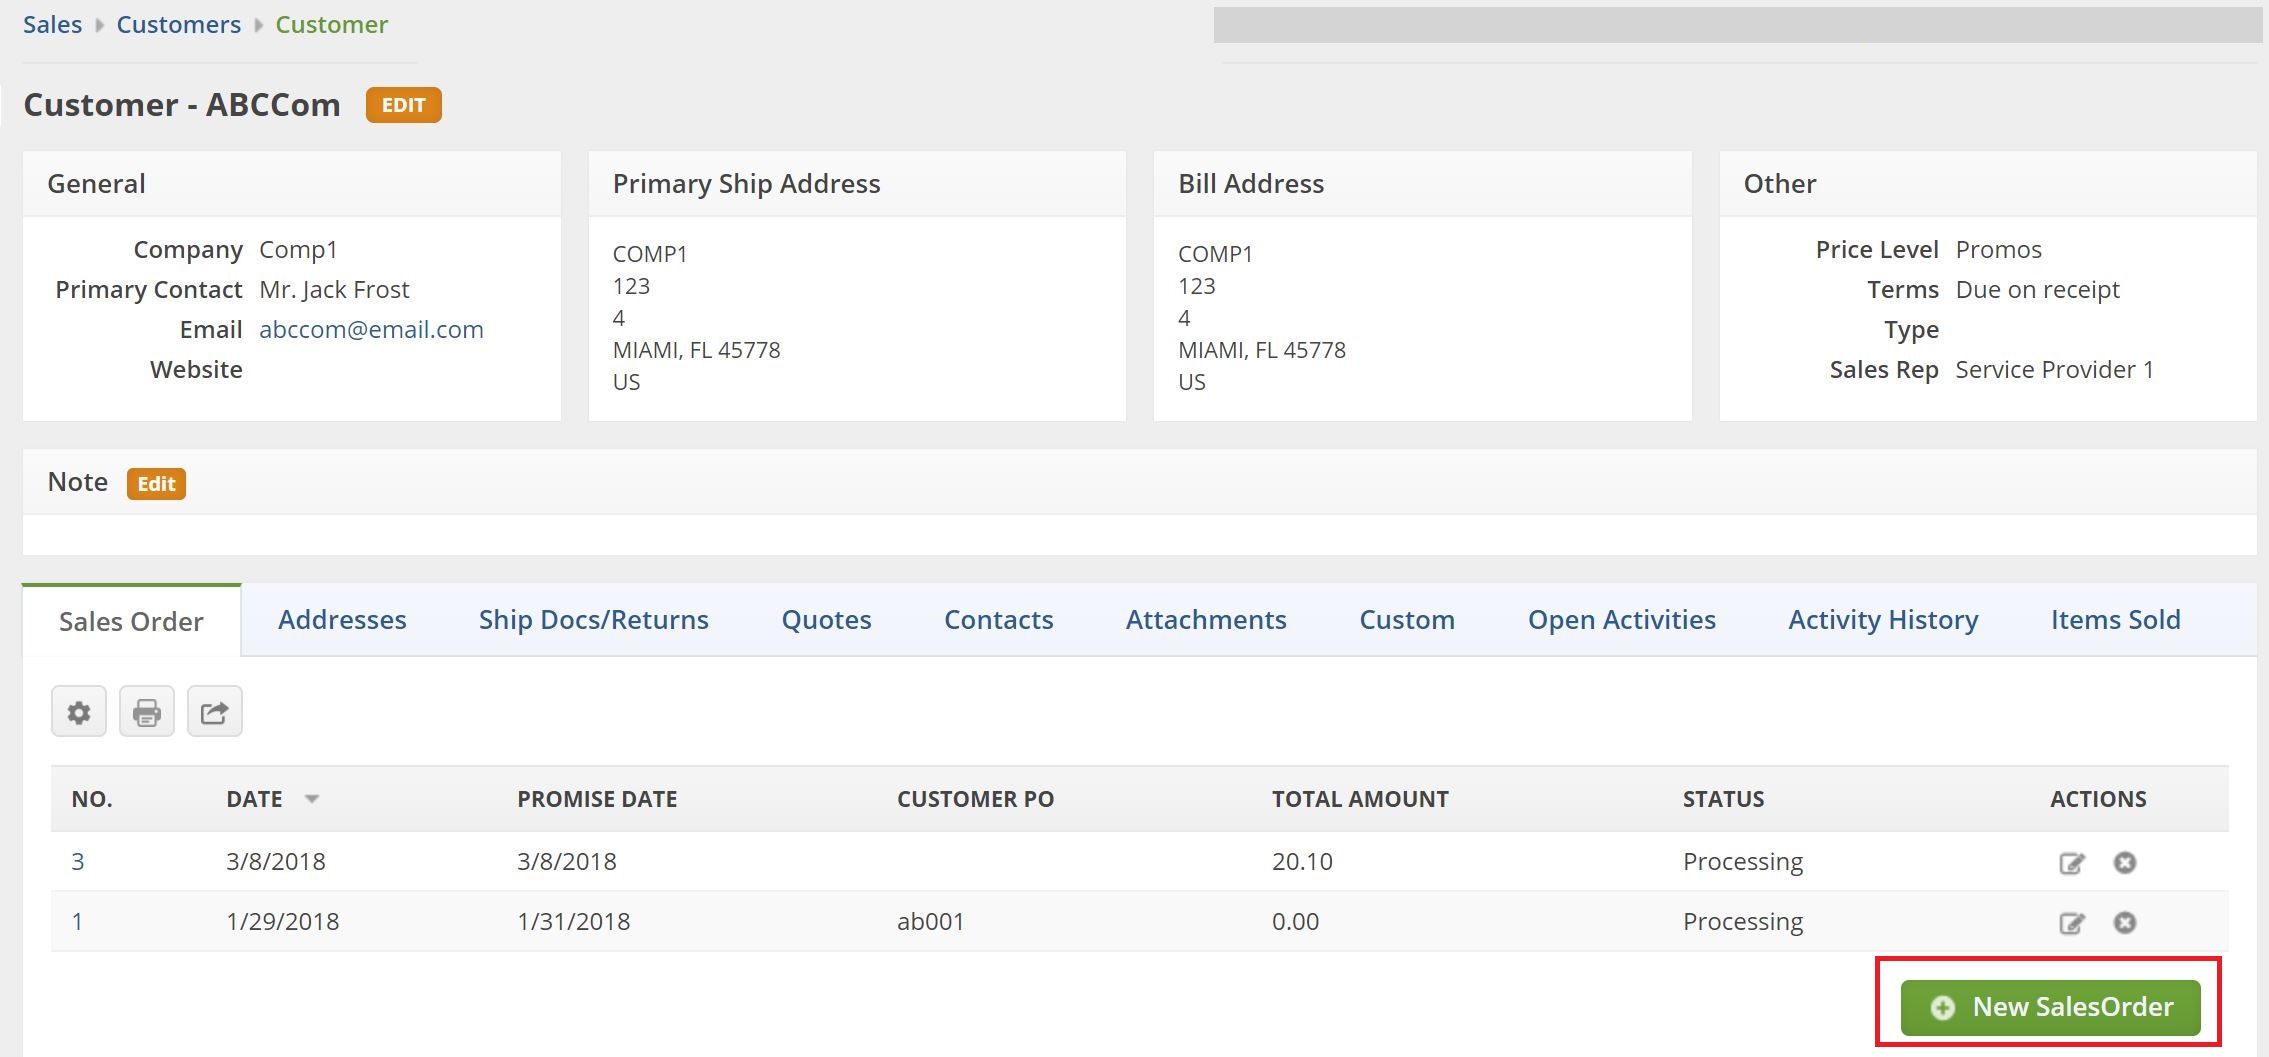
- Select a customer.

- On the Customer screen, click the +New Sales Order button located at the bottom right hand corner.
- Follow Creating a new Sales Order procedures.


