Overview
Inventory adjustments are increases or decreases made in inventory to account for theft, loss, breakages, and errors in the amount or number of items received.
Complete an Inventory Adjustment
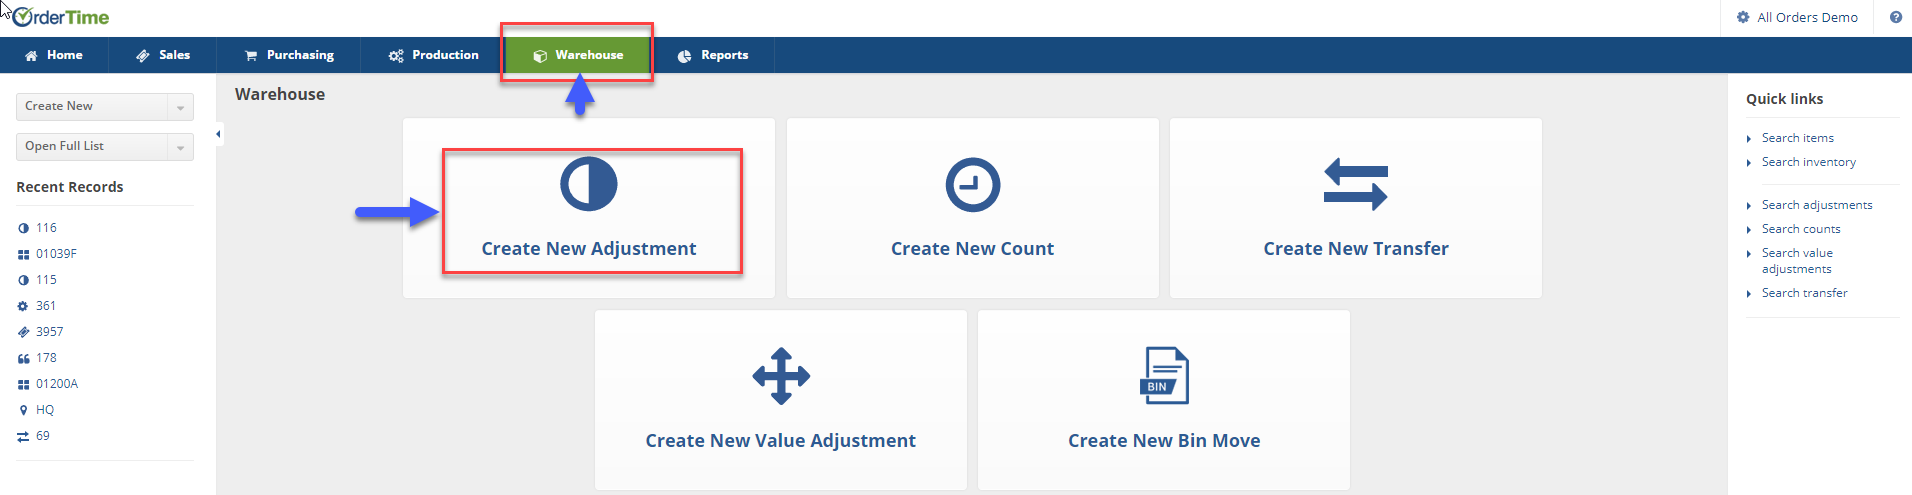
The Create New Adjustment module is used for completing inventory adjustments to your 'OWNED' inventory. You will be able to change your Account, Complete Item Adjustments (Add, Remove stock). Complete the following steps to complete an Inventory Adjustment:
On the OrderTime main page, click on the Warehouse module and select Create New Adjustment section.
The Adjustment screen will generate the next available adjustment number. On this screen, you will choose the Date, Location, Account to be posted, Class. You will be able to type additional information under the Memo section of the screen.
- The date will be very important. Whatever adjustments are completed for the chosen date, it will be marked in your books as of that date. Your inventory will reflect the changes completed for the date posted for your adjustment.
- Select the Account type you will be making the adjustment to. This selection will depend on the type of inventory adjustment.
- If you are inputting your opening inventory pick an Equity Account.
- If you are doing write offs, select a Cost of Goods or an Expense Account. (i.e. Spoilage)
- Select class if needed.
- Type in the inventory adjustment information in the Memo section. (i.e. found items XZY damaged at location, removed from inventory)
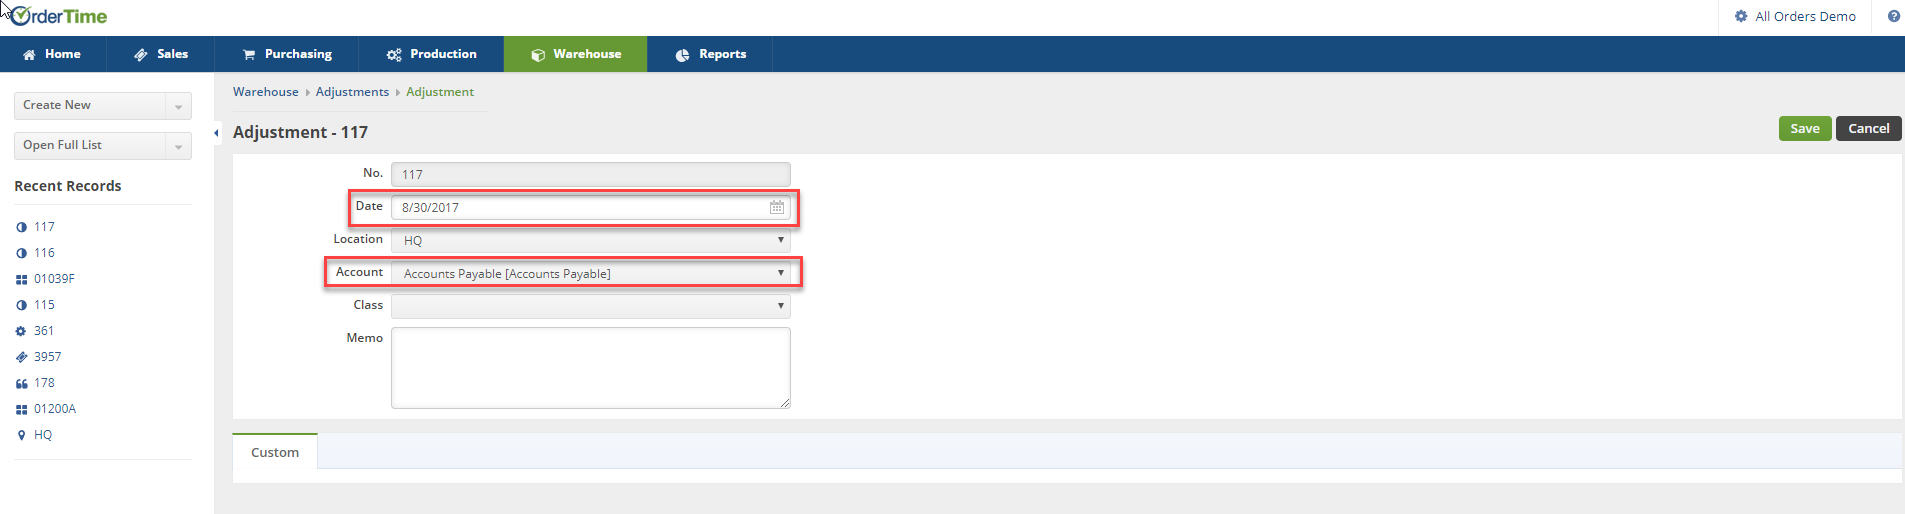
Click on Save when done.
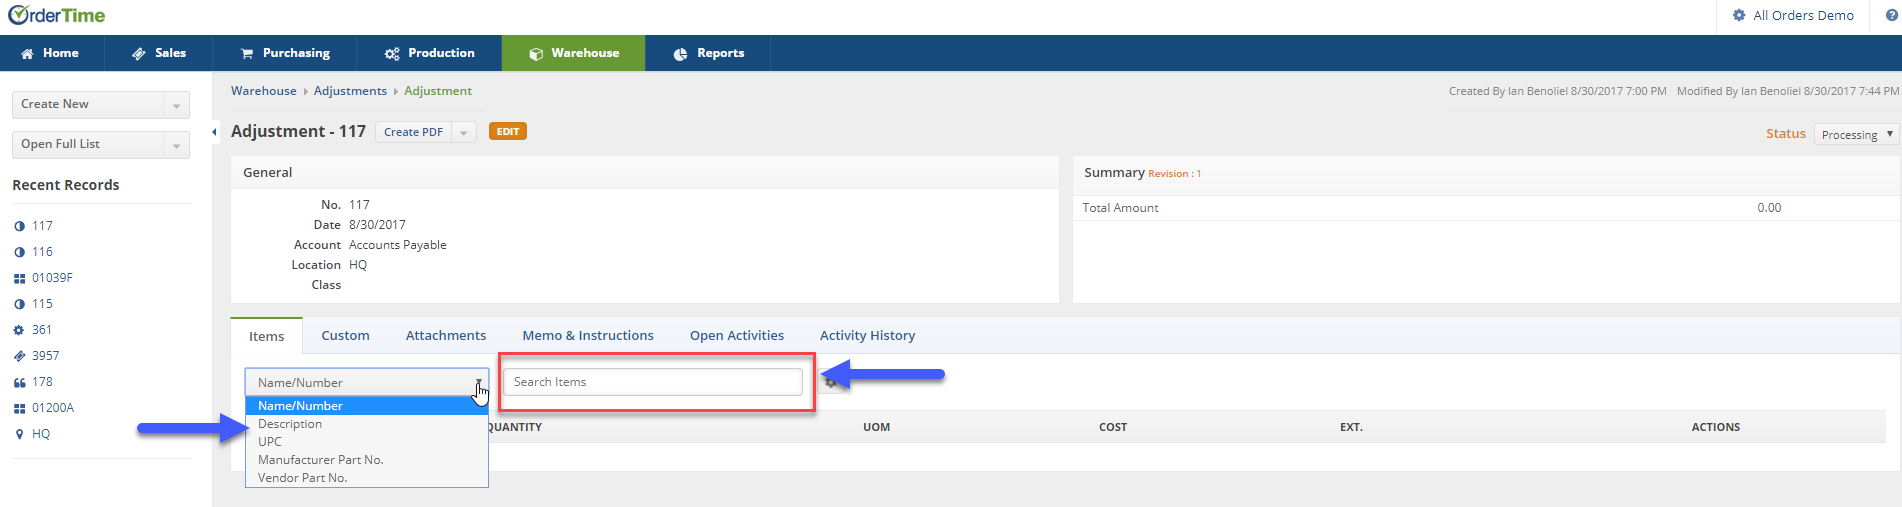
On the Adjustment screen, under the Items tab enter the item number. You also have the option to sort your items by selecting from the drop down menu (i.e. Name/Number, Description, UPC, Manufacturer Part No, Vendor Part No)
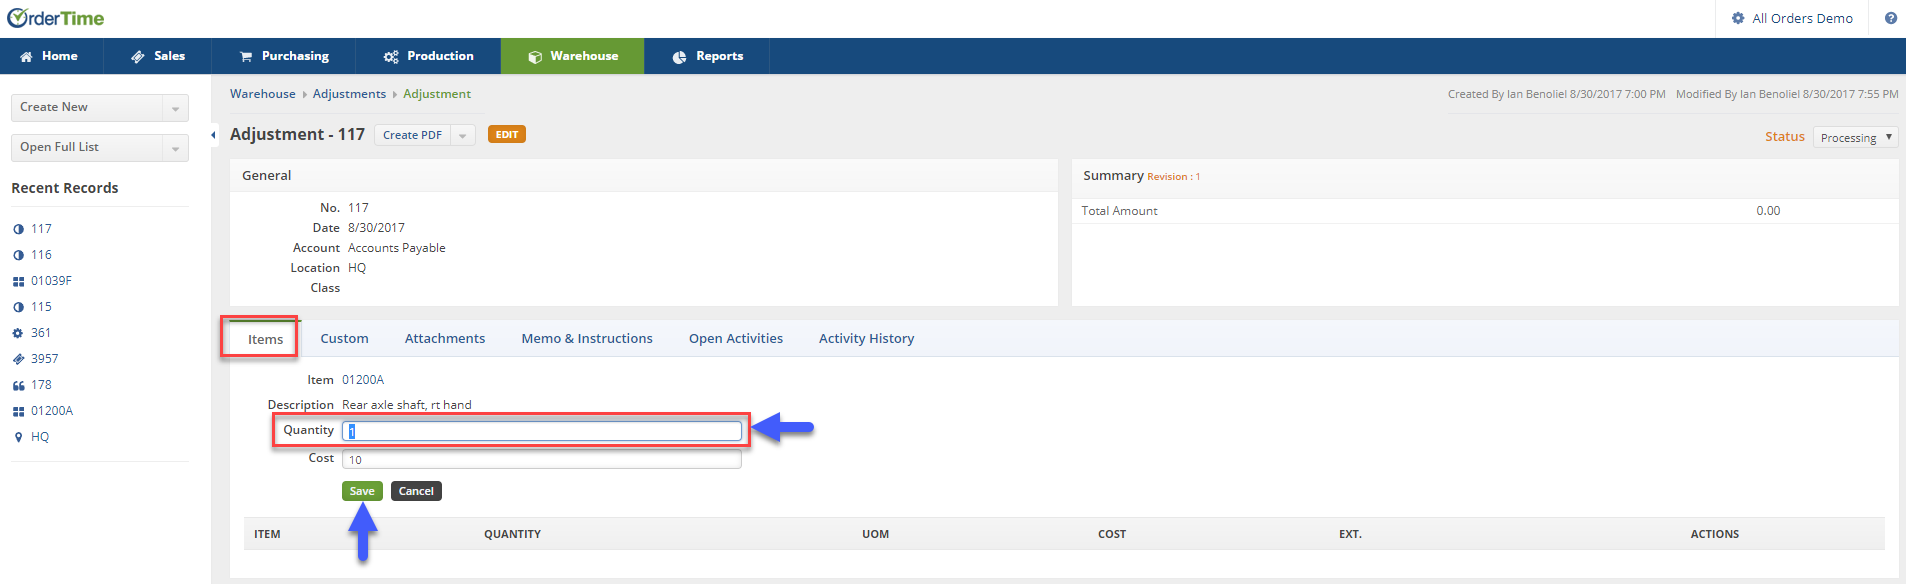
The next screen will allow you to enter the a number of items to be added/deleted (-/+) from inventory.
- In the Quantity box, enter the amount to be added or deleted.
- Deleted items are to be documented by (-) minus prior to the amount (i.e. -1)
- Added items are to be documented by the (+) plus prior to the amount (i.e. +1)
- In the Cost box, enter the cost for the item. (item cost will default to the original set up price)
- Click on Save when done.
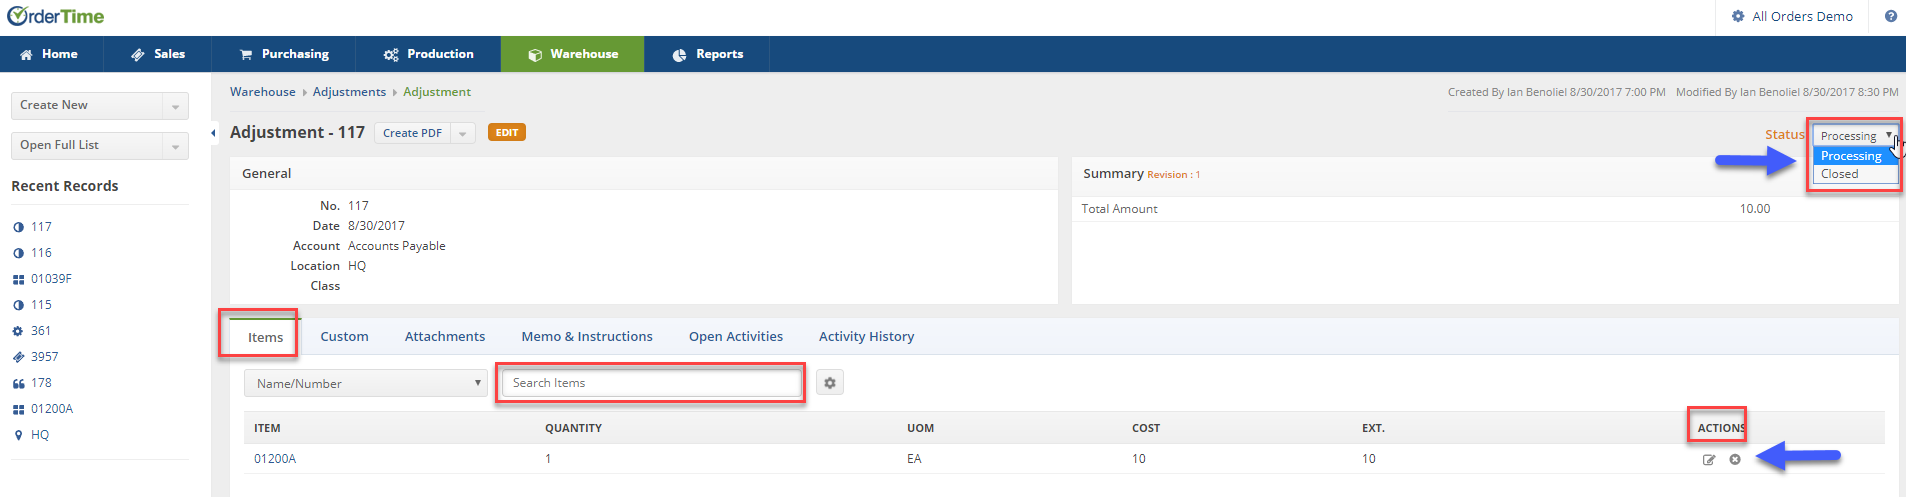
The Items added/deleted will be displayed on the next screen. On this screen, you will have the option to edit your adjustments.
- If there is a need to change the Item quantity, click on the Note icon under the ACTIONS column.
- To delete your line item, click on the X under the ACTIONS column.
- To add more items, type in a new item number in the Search Items box.
- To complete the inventory adjustment, change the Status from Processing to Close in the Status drop down menu.
- Click on the Memo & Instruction tab to include pertinent information to your adjustment.
- If you select the Open Activity tab you can Add and Event or Add a Task for your inventory staff.
- Under the Activity History, you can review the Item recent history or Add a Log/ Send Emails to staff to indicate the recent inventory adjustments.