Overview
A cycle count is an inventory auditing procedure, which falls under inventory management, where a small subset of inventory, in a specific location, is counted on a specified day.
Generate a Cycle Count
The Create New Count module is used for completing inventory cycle count to your 'OWNED' inventory. When you create a new count you are able to assign randomly a section of your inventory for an audit, review results, print reports and research miss counts.
Complete the following steps to complete a New Count (Cycle Count):
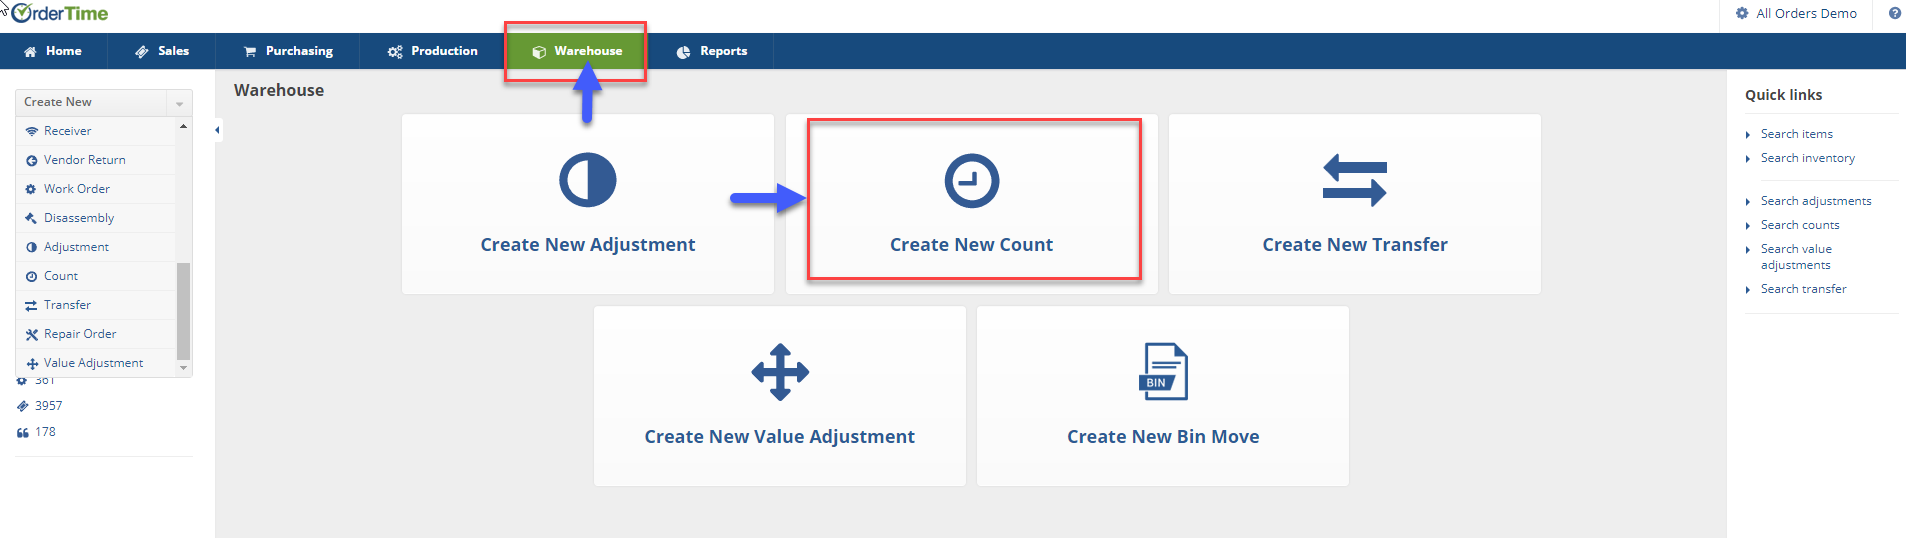
On the OrderTime main page, click on the Warehouse module and select Create New Count section.
The Count screen will generate the next available count number. On this screen, you will choose the Date, Location, Account to be posted, Class.
- The date will be very important. Whatever counts are completed for the chosen date, process will be marked in your books as of that date.
- Select the Account type you will be making the adjustment to. This selection will depend on the type of inventory adjustment.
- If you are opening a transaction pick an Equity Account.
- If you are doing write offs, select a Cost of Goods or an Expense Account (i.e. Spoilage)
- Select class if needed.
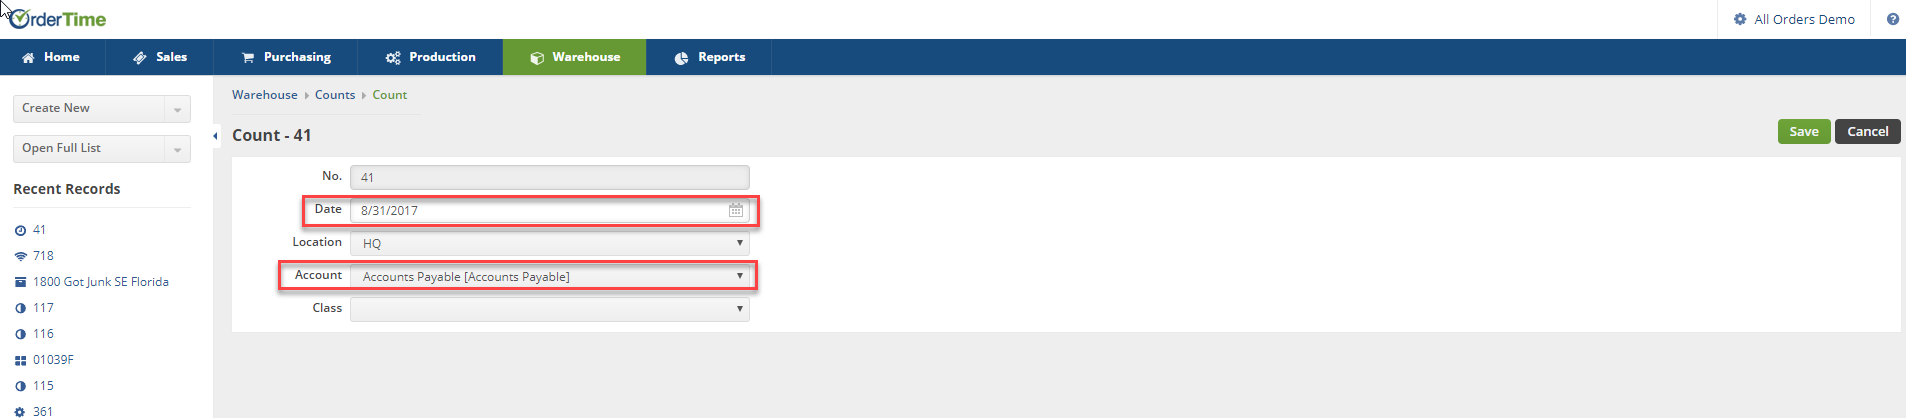
Click on Save when done.
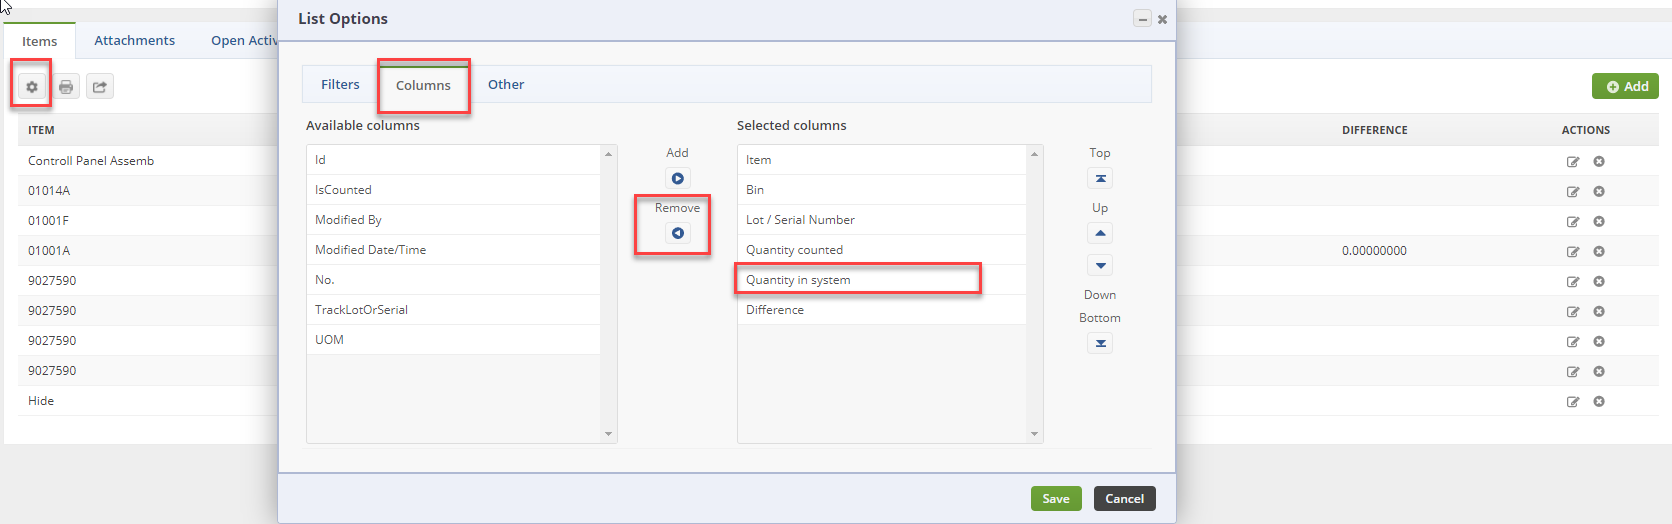
The Count screen will display a list of Items, Bin location, Lot/Serial Number, Quantity Counted, Quantity in System, Difference and an Action Column.
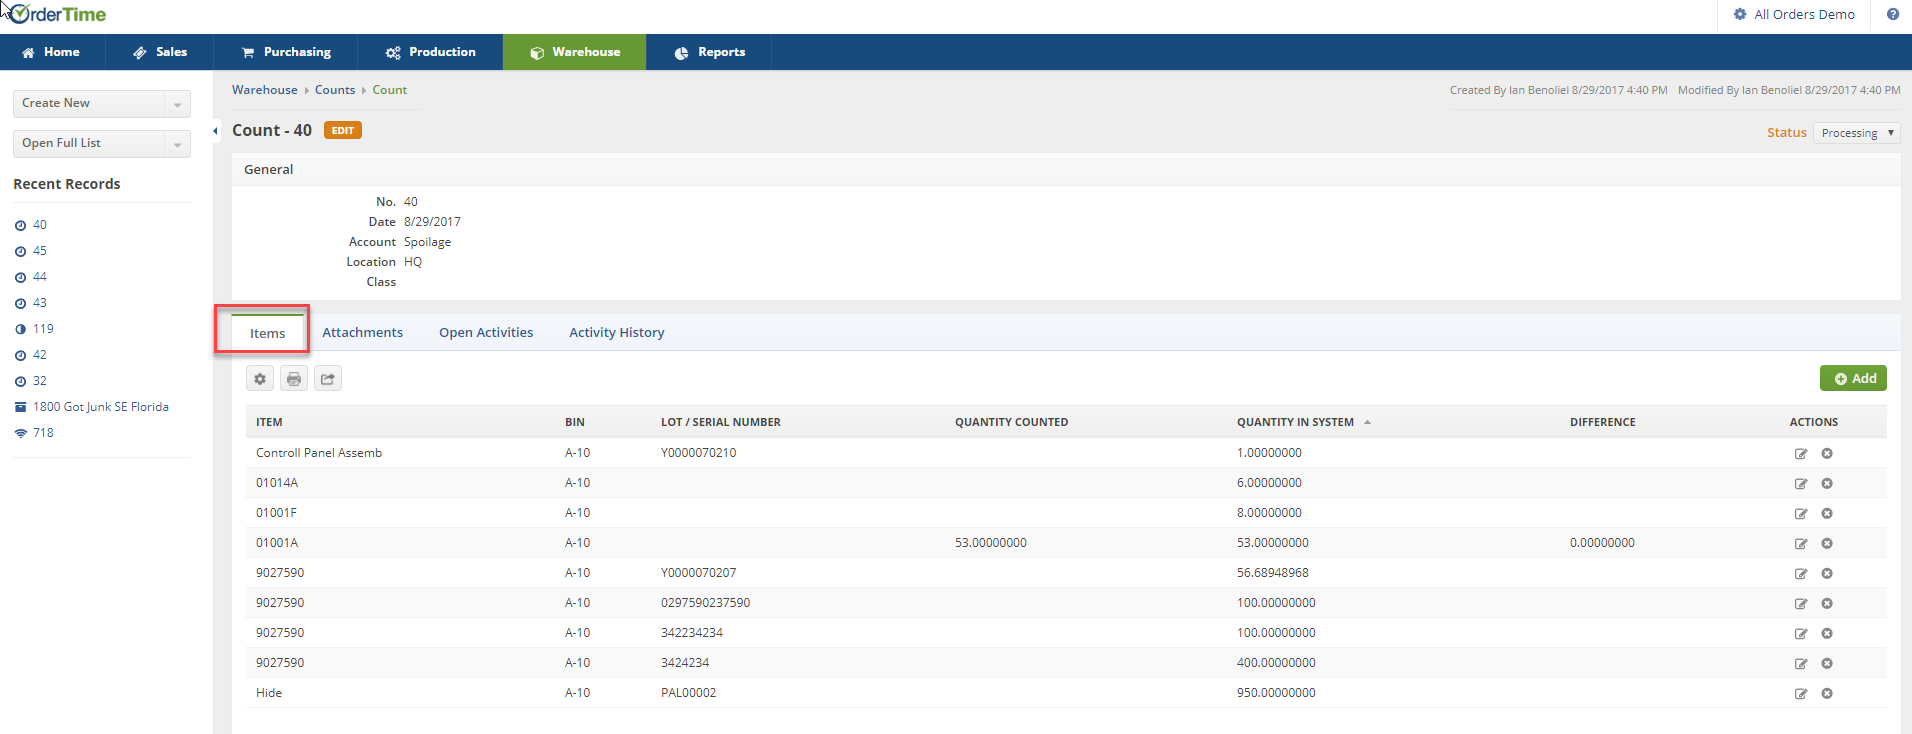
- You can print a cycle count list and hand out to your inventory associates.
- You can remove the Quantity in System column prior to generating a print out.
- Click on the Gear icon under the Items tab.
- Click on the Columns tab
- Select 'Quantity in the System'
- Click on the 'Remove' icon
- Once the print out is give out, you can restore the "Quantity in the System" setting in the system.
- Click on the Columns tab
- Select 'Quantity in the System' under Available columns
- Click on the 'Add' icon
- Click on Save when done.
If you wish to add an additional location to your count, click on the +Add icon to the right of the screen.
- Enter the Item Number, Bin Location
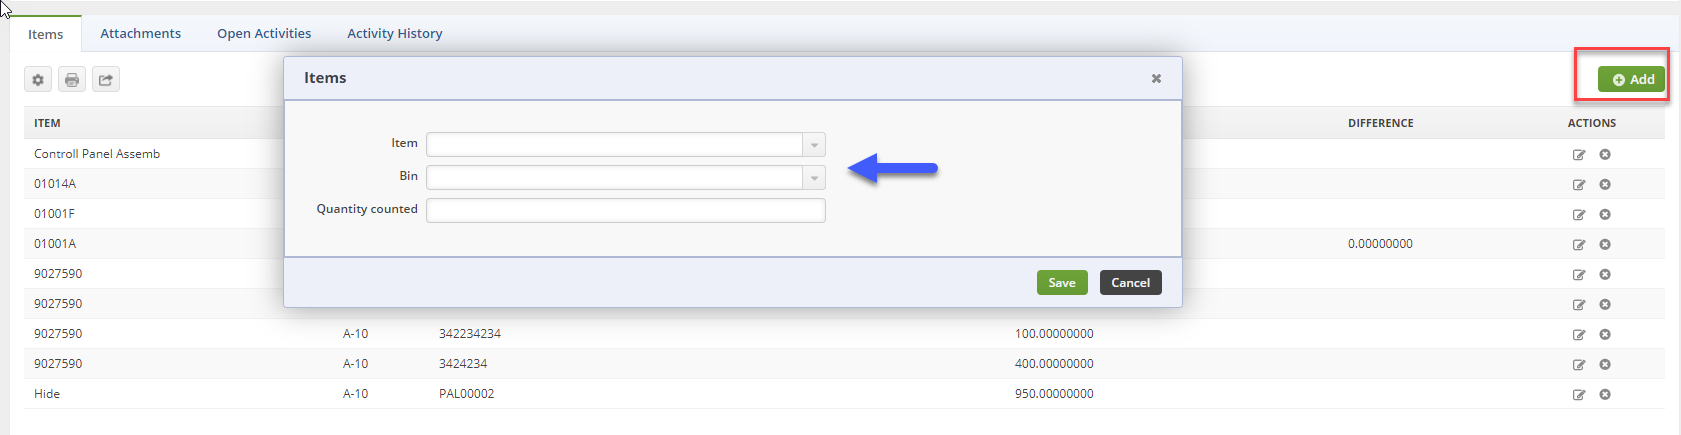
- Click on Save when done.
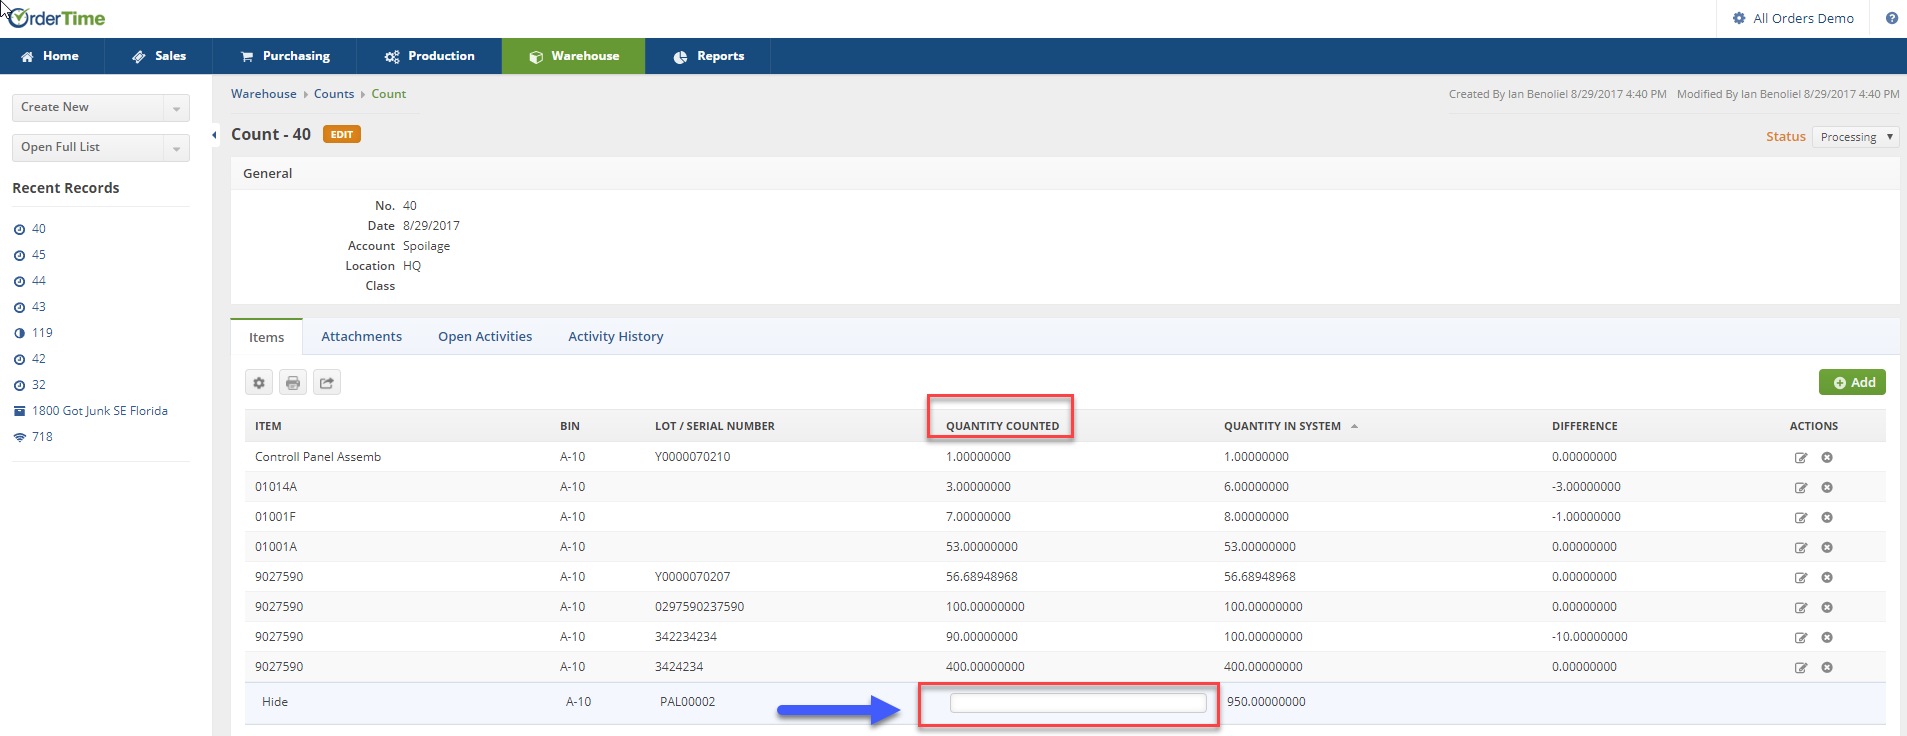
Enter Quantity Counted
Once you have counted your your bin quantities, enter the count for each item line.
- Click on the line item under the 'QUANTITY COUNTED'
- You can also click on the Note icon under ACTIONS column
- Enter the Quantity counted, press Enter
- Click on Save
- You can also click on the Note icon under ACTIONS column
- Enter the Quantity counted, press Enter
- You must enter a quantity when processing a count. If there is no items in the Bin, type '0' under the quantities counted.
- Proceed to the next line on the list
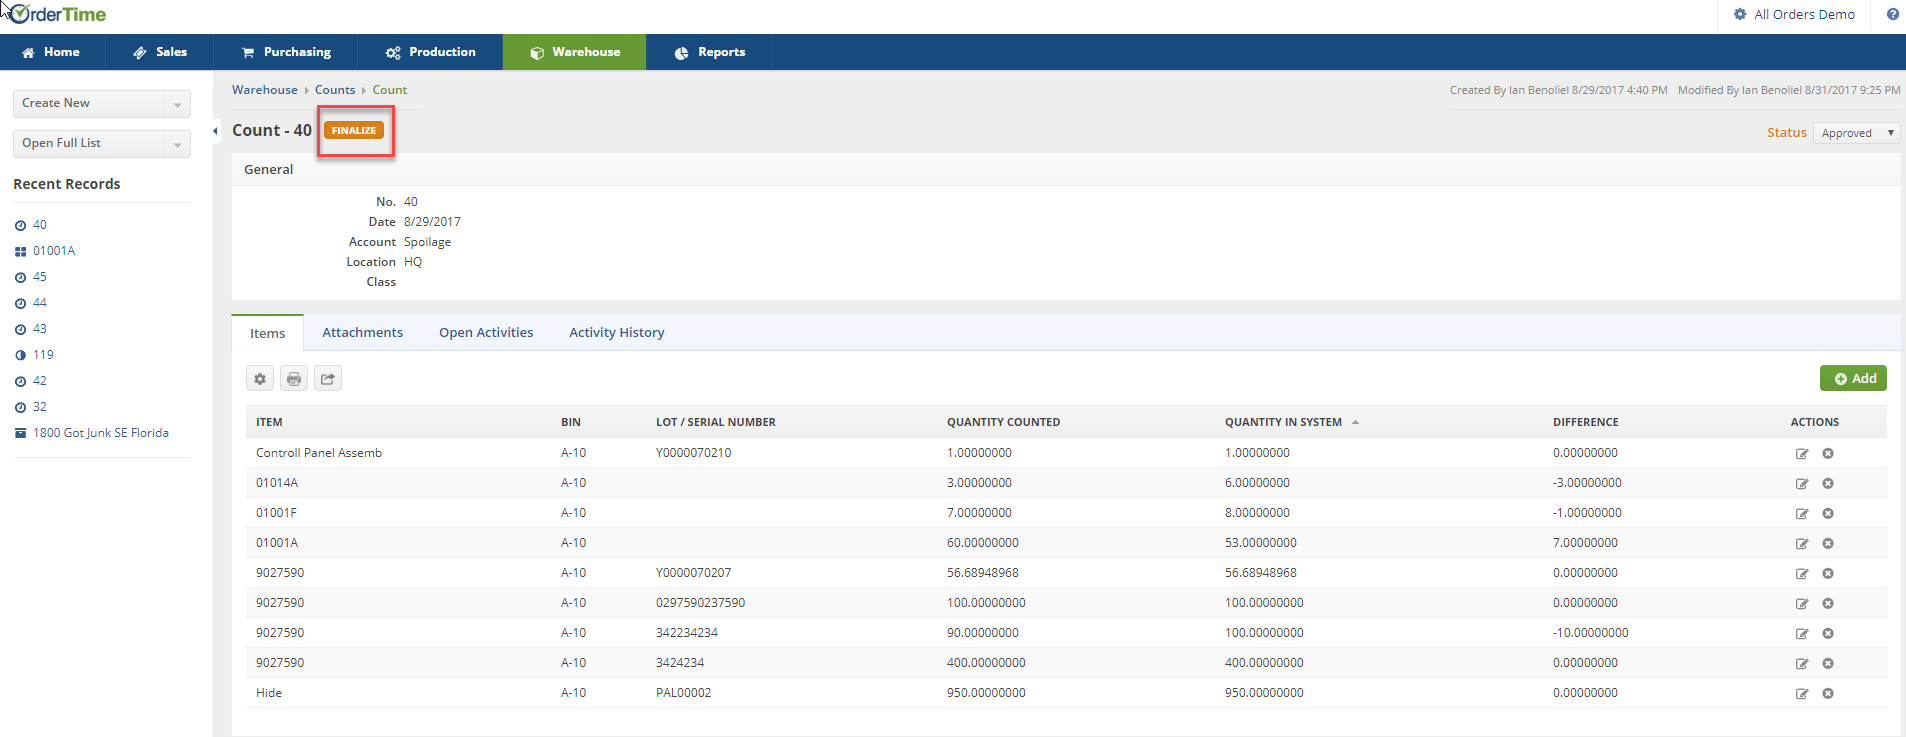
When all the have been entered, change the Status from processing to Approved.
- Once you have approved the cycle count, you can not change the report under the Quantity Counted.

Finalize Cycle Count
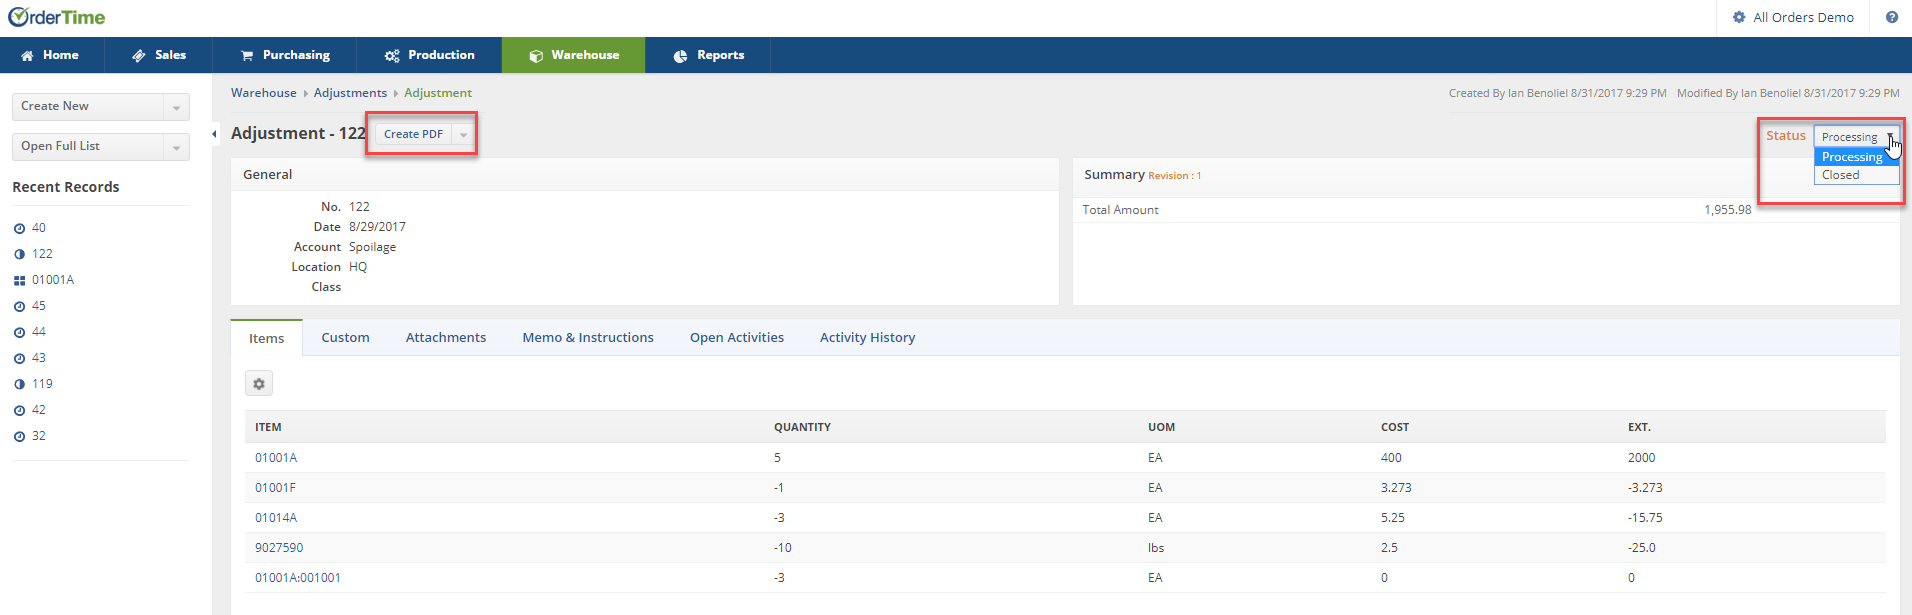
Complete the cycle count by clicking on the Finalize icon.
- The screen will prompt you to complete your adjustment
- Click on the 'To Adjustment ###' icon to complete adjustment to your cycle count
An adjustment screen will display a variance report with the items that need to be adjusted. Complete adjustments with the 'Create New Adjustment' module. (See Complete Inventory Adjustments article for more information)
- Close the status when done.
- Print the Variance Report by clicking on the Create PDF
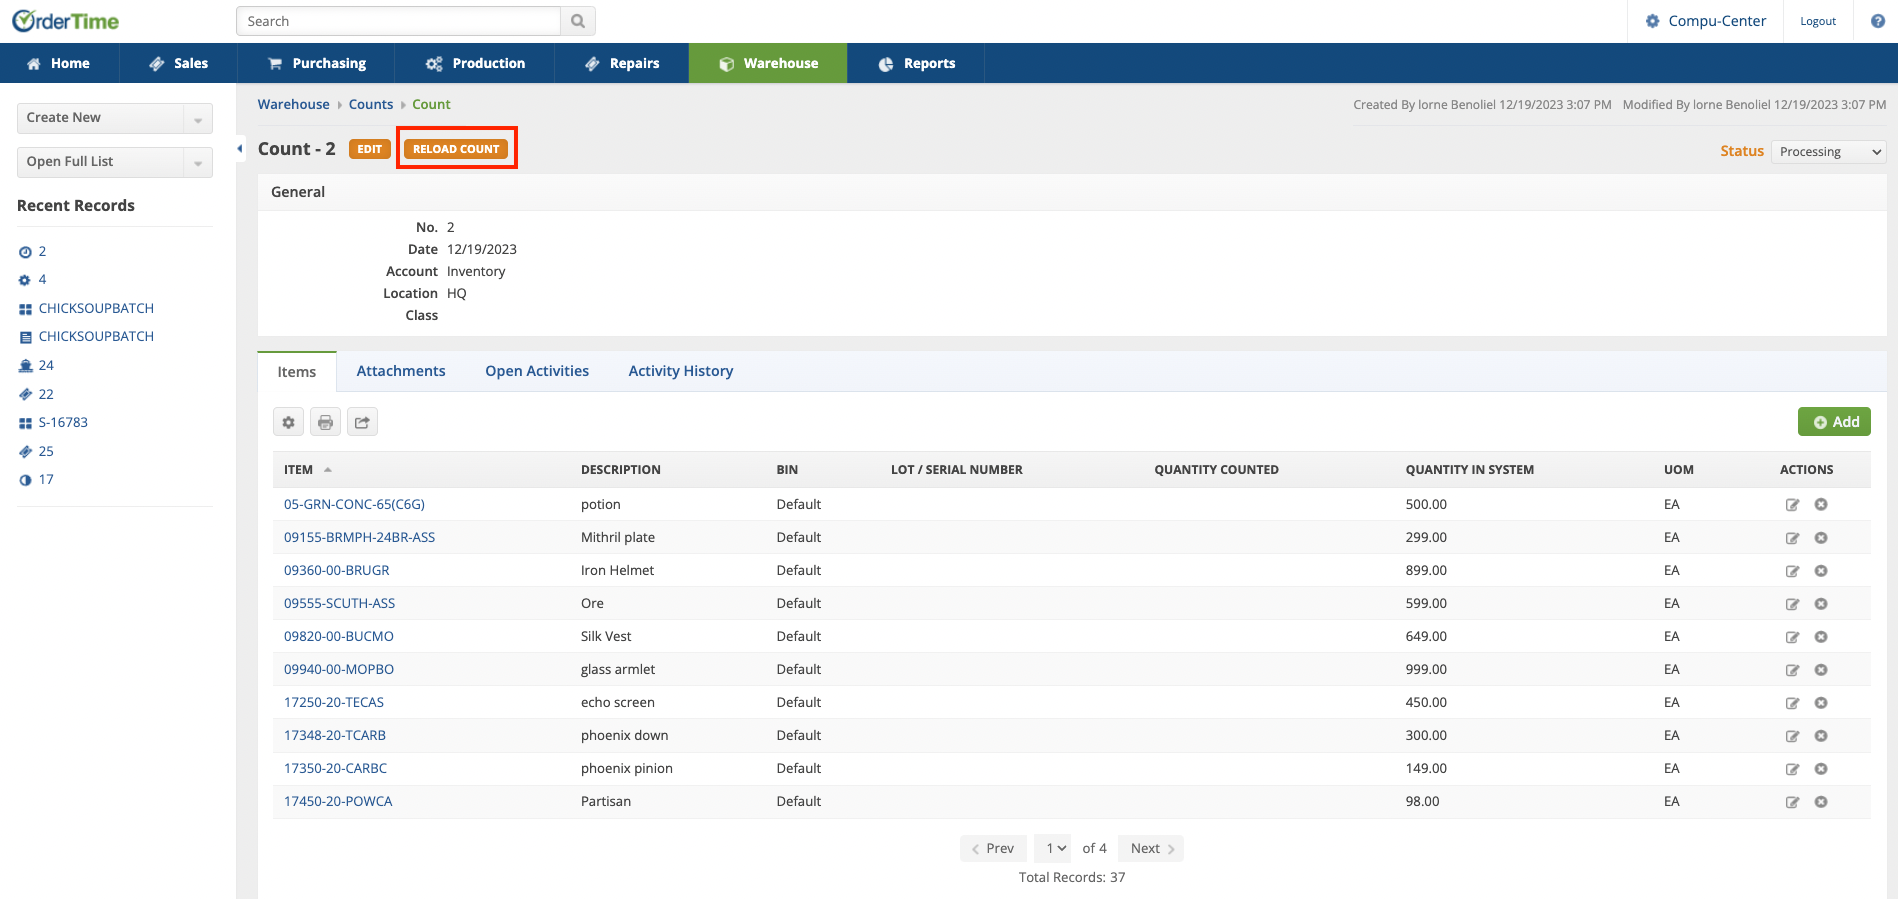
Reload Count:
If there are any pending or new transactions created that you want included in the count but weren't, and that affected the number in inventory that you would like included in your count, the recalculate button will apply any changes made to inventory from the point the count was originally made to the moment you want to update.