Overview
The Production Reorder Analysis is a tool in Order Time that analyzes data and aggregates all the unfilled Assembly Items from Approved SOs within the Time horizon selected allowing you to create a single combined work order for items that exist on multiple Sales Orders.
Depending on your business requirements, running a Reorder Analysis can be periodically or every day.
Solution
Creating and Running a Reorder Analysis for Production
Reorder Analysis can be accessed from the Production tab. Follow the steps below to create and run a Reorder Analysis.
- Click the Reorder Analysis link.

- Click +Production.

- Fill out the form in Demand Options tab.
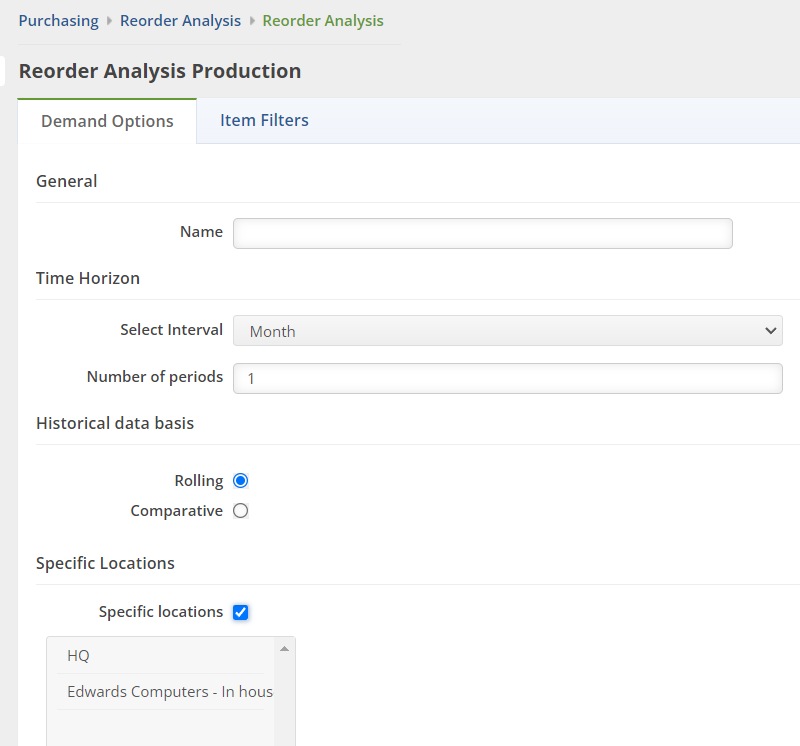
- Name - Assign a name to your Reorder Analysis.
- Time Horizon - This allows you to project out a certain time range in months or weeks. Choose either Month or Week from the Select Interval pick list, then enter a value in the Number of periods field.
- Historical Data Basis - With the given value that you provided for the Time Horizon, this enables you to set up the basis for the historical data that you want to extract.
- Rolling - If you select this, it means you want the system to give you an analysis immediately before the predetermined value given in the Time Horizon.
- Comparative - It prompts the system to analyze data from the same time (i.e. value in Time Horizon) last year.
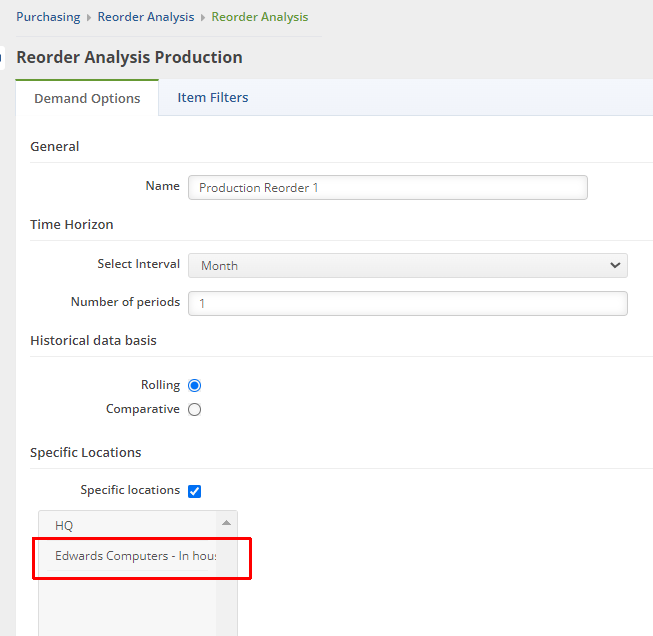
- Specific Locations - To select a specific location when running a Production Reorder Analysis follow the instructions below.
- Click the Specific locations checkbox on the Demand Options tab of the Reorder Analysis Production window
- Now Select your desired location from the scrolling list showed in the red box.
- Set the rest of the Reorder Analysis settings as needed and then click the Save button in the top right
Leaving this unchecked means you are selecting all locations.
4. Click the Item Filters tab and set your filters by selecting items to flag by.
Filtering is a practical way to see only the data that you want displayed. The main filter is Show items when 'Evaluation Quantity'is.
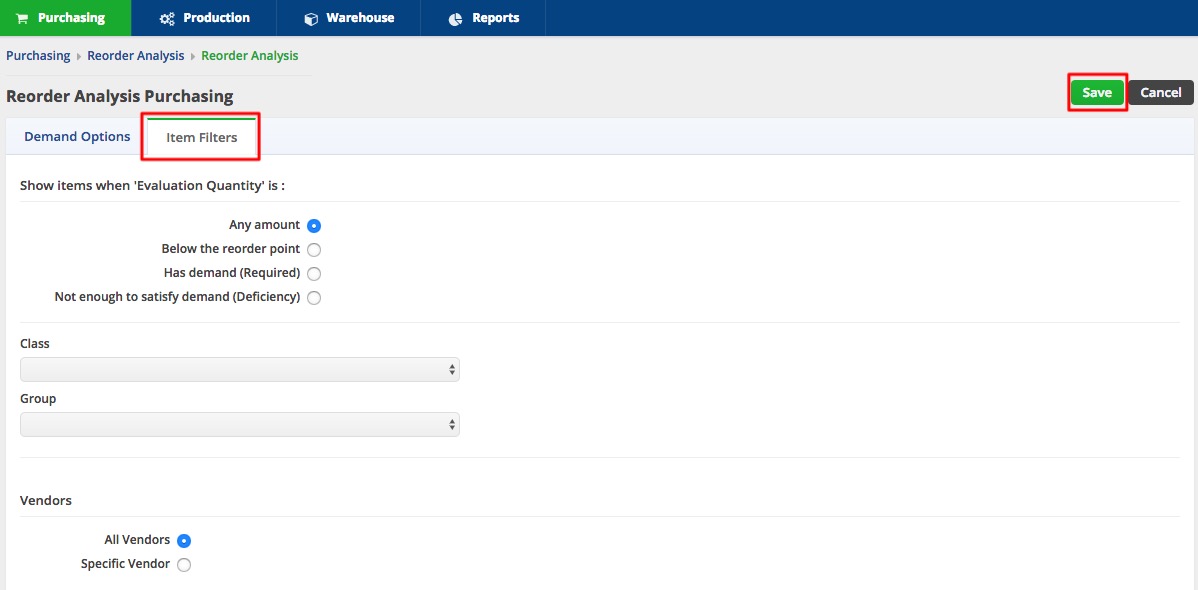
Evaluation Quantity is what you have available today (Item > Available inventory) plus what you have on Purchase Order (Item > On order). 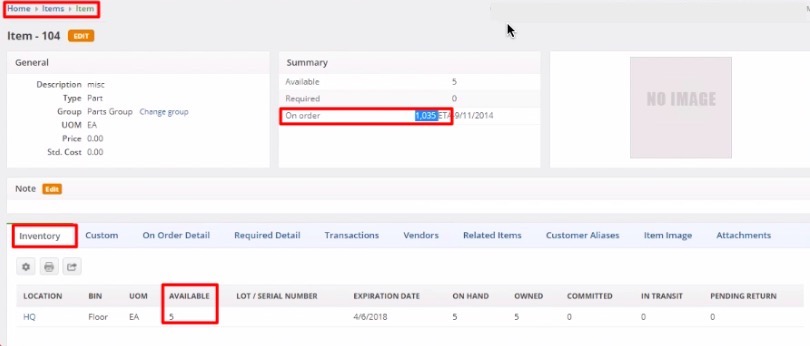
This setting tells Order Time how you wish to determine when an item qualifies for reorder. There are different ways to filter out possible reorder candidates:
- Any Amount - This means that you want the system to show you all items in every amount.
- Below the Reorder point - This references the reorder point specified on the Item > Production tab > Reorder Point field.

The reorder point (ROP) is the level of inventory which triggers an action to replenish that particular item. It is a minimum amount of an item which a firm holds in stock, such that, when stock falls to this amount, the item must be reordered.
- Has demand (Required) - The 'Required' amount is the total number of the item on open Sales Orders plus unallocated components on Work Orders that are in 'waiting' or 'ready' status.
- Not enough to satisfy demand (Deficiency) - This means that the quantity in stock is lower than the quantity specified in the Sales Order.
You can also filter data and find what is likely to be of interest and useful to you by any of the following:
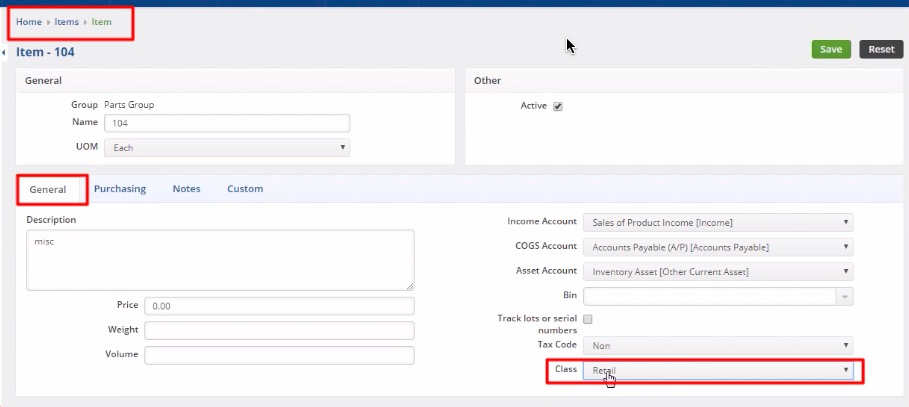
- Class - This references the Class specified on the: Item > General tab > Class field.
- Group - This references the Group specified on the: Item > Group.

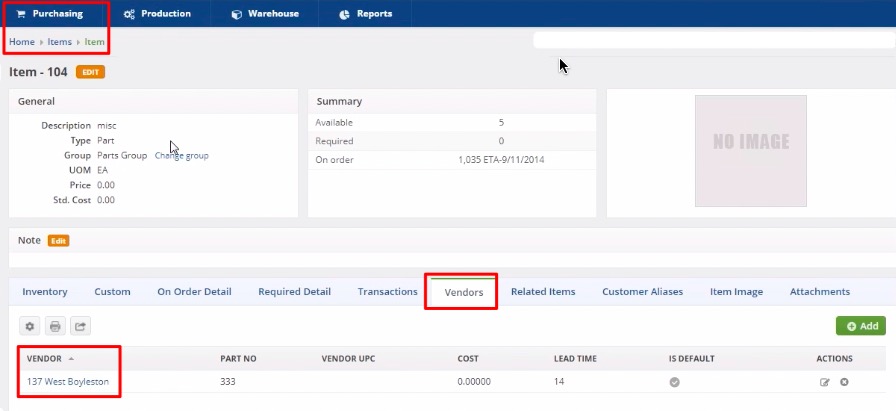
- Vendors - This references the Vendor specified on the: Item > Inventory tab > Vendor column.


5. Click Save. Once saved, the Reorder Analysis runs.
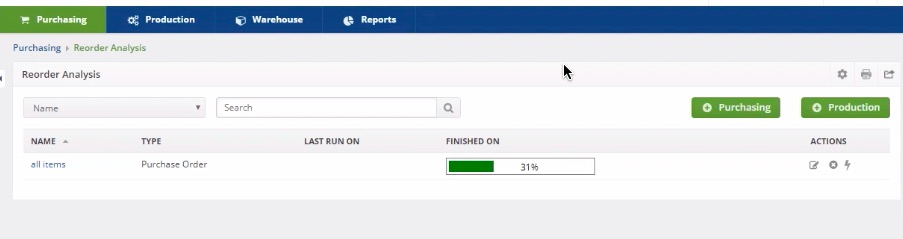
You do not have to re-create your Reorder Analysis every time, all you have to do is Re-Run it to get fresh results.
