Overview:
Utilizing Item Aliases can be extremely helpful. Aliases allow you to use multiple names (SKUs) for the same item. This helps when you and your manufacturer call the same part by different names, or if you have a name for a part, but call it something different for your customers.
Use Cases:
Customer Facing - Different Customers may have different names for the same Item. You can list those under each item.
- Select your Item from your Items list.
- Select the Customer Aliases tab.
- Select the green Add button towards the right hand portion of the screen.
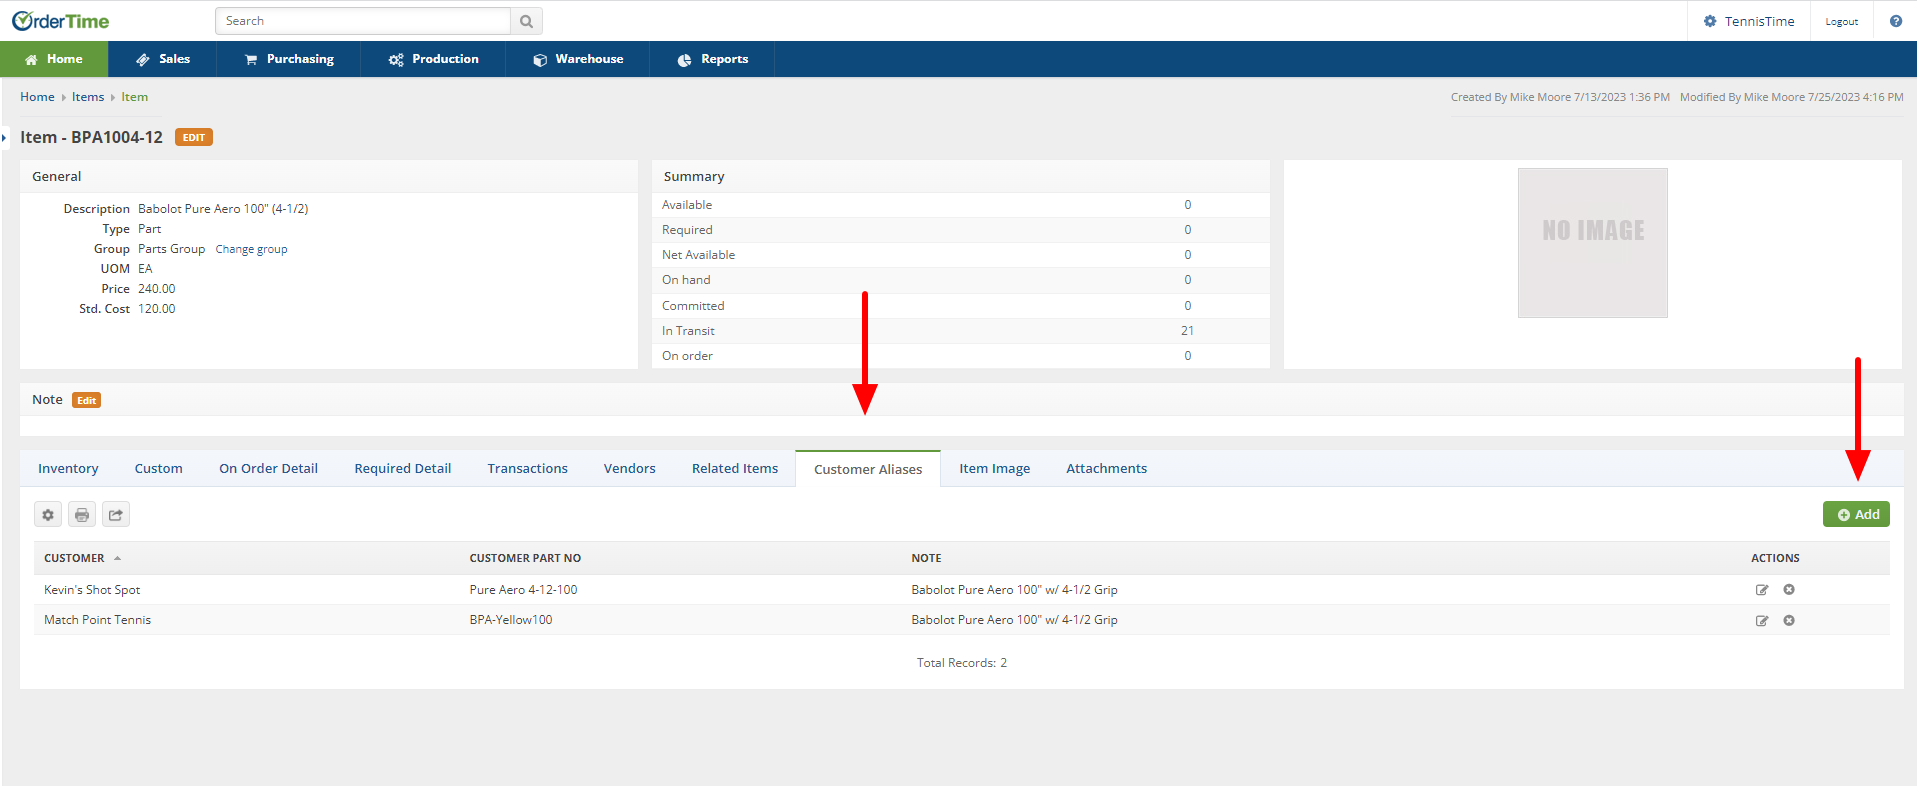
- Selecting the Add button will present the Customer Aliases window.
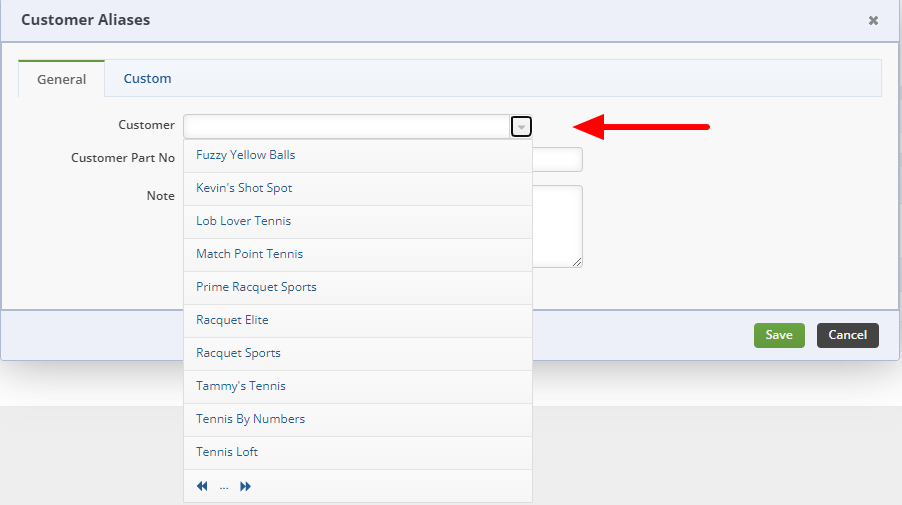
- Within the Customer Aliases window select the Drop Down from the Customer field to select the customer to update the Item Alias.
- Update the Customer Part No. and the Note fields as needed.
- Click the Save button.
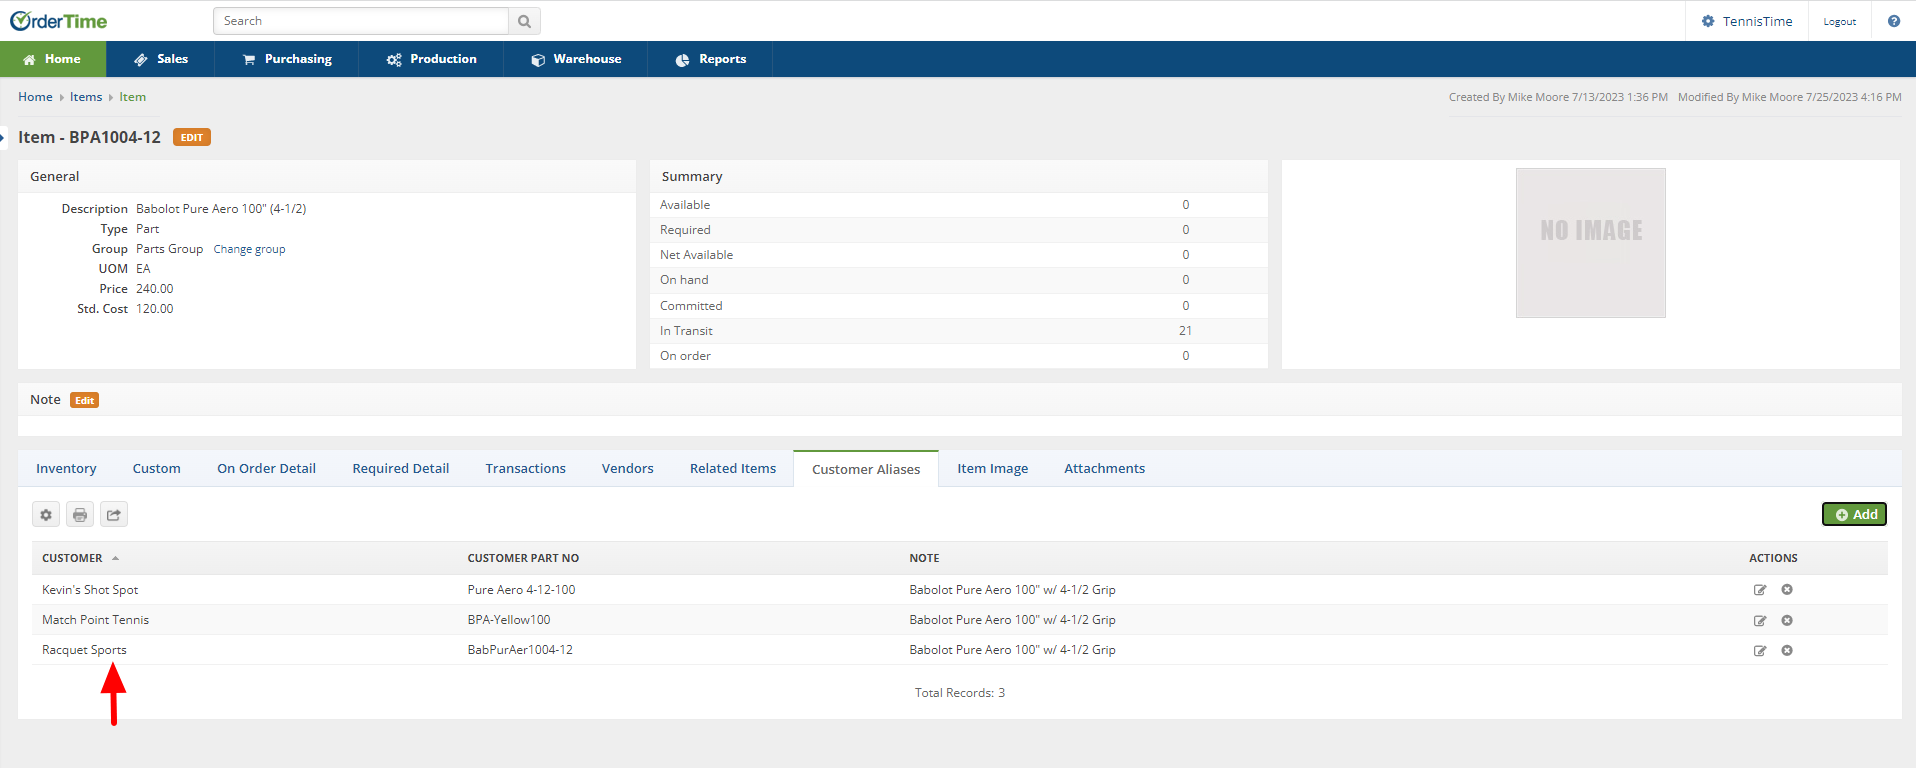
- Once Saved the Customer Alias has been added to the Customer Aliases listing.
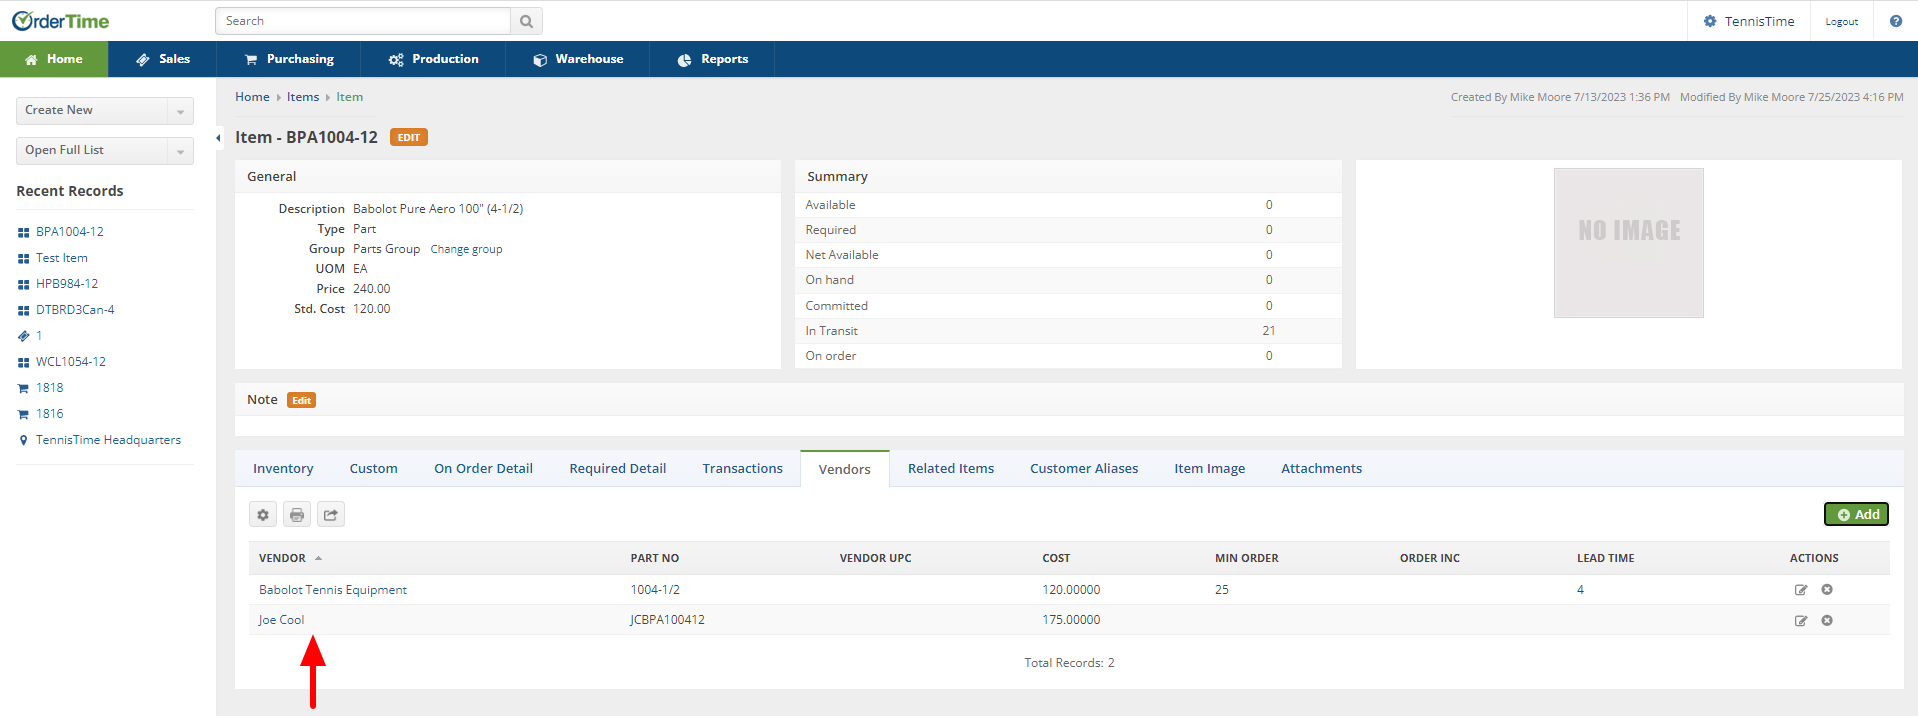
Vendor Facing - Different Vendors may have different names for the same Item. You can list those under each item.
- Select your Item from your Items list.
- Select the Vendors tab.
- Select the green Add button towards the right hand portion of the screen.
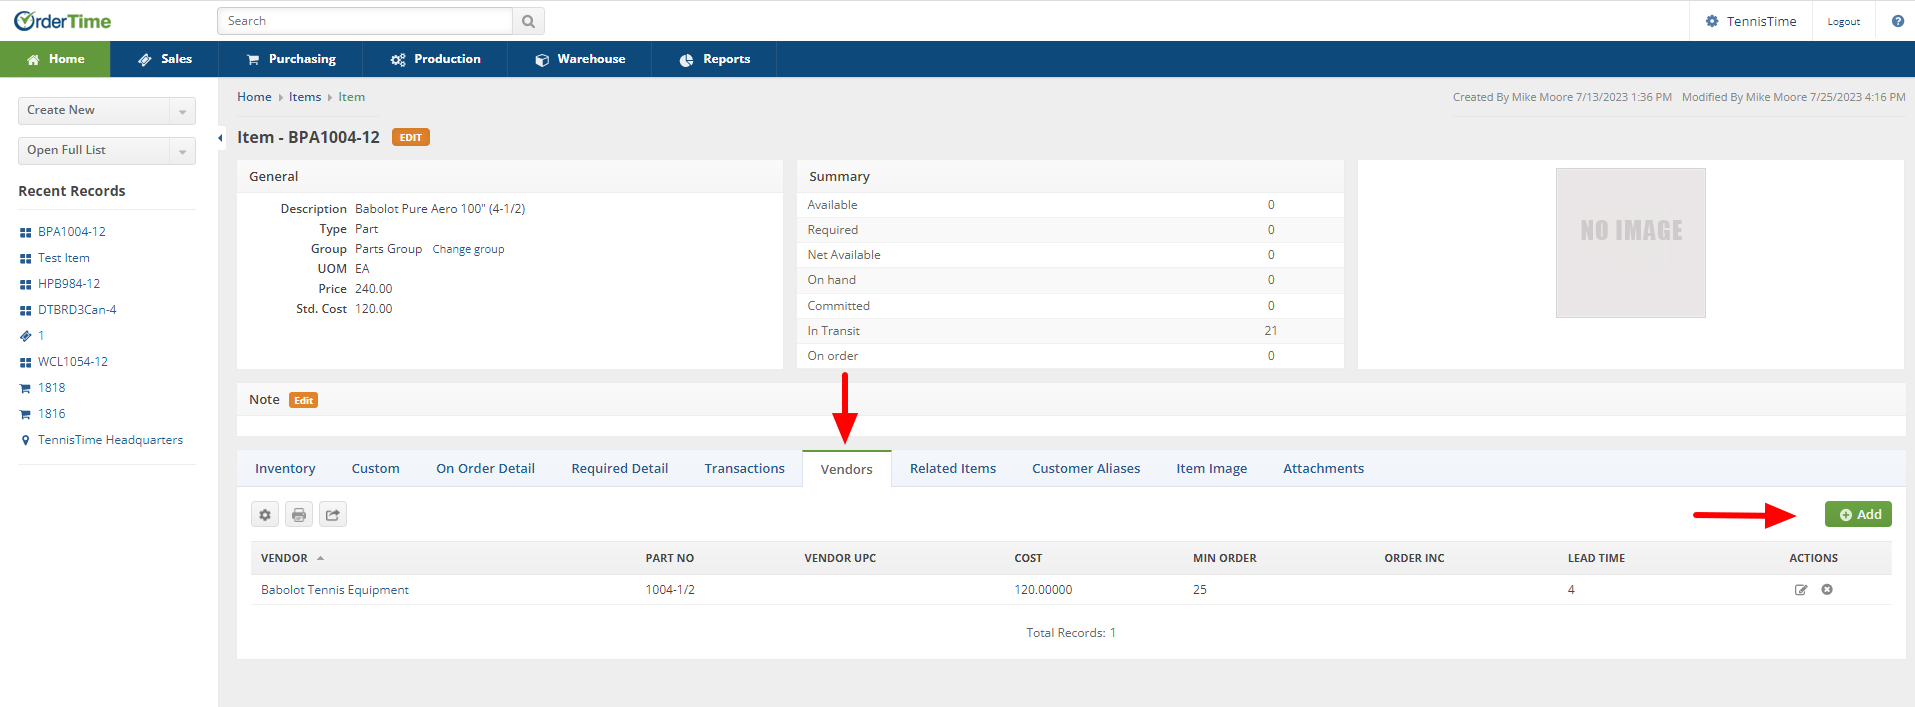
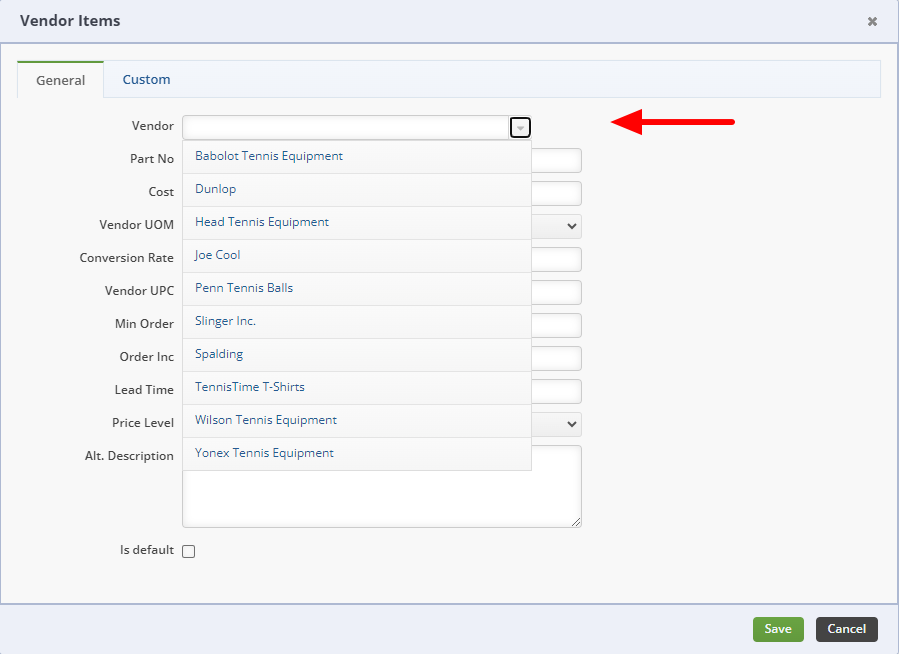
- Selecting the Add button will present the Vendor Items window.
- Within the Vendor Items window select the Drop Down from the Vendor field to select the Vendor to update the Item Alias.
- Update the additional fields as needed.
- Click the Save button.
- Once Saved the Vendor Alias has been added to the Vendor listing.
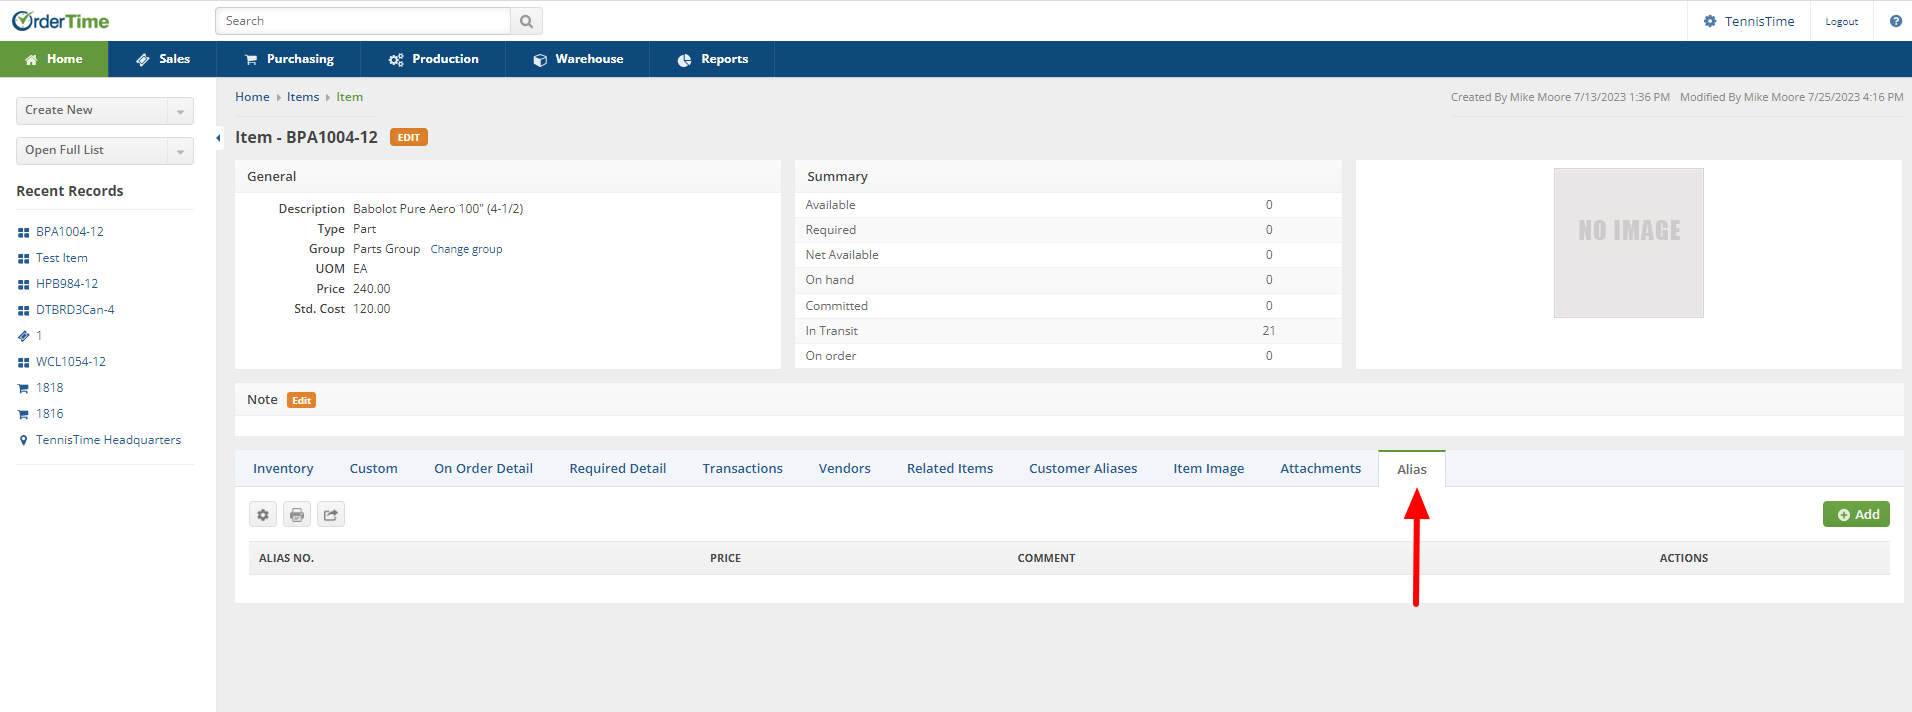
Manufacturer Facing - Different Manufacturers may have different names for the same Item. You can list those under each item.
- Select your Item from your Items list.
- Select the Alias tab.
- Select the green Add button towards the right hand portion of the screen.
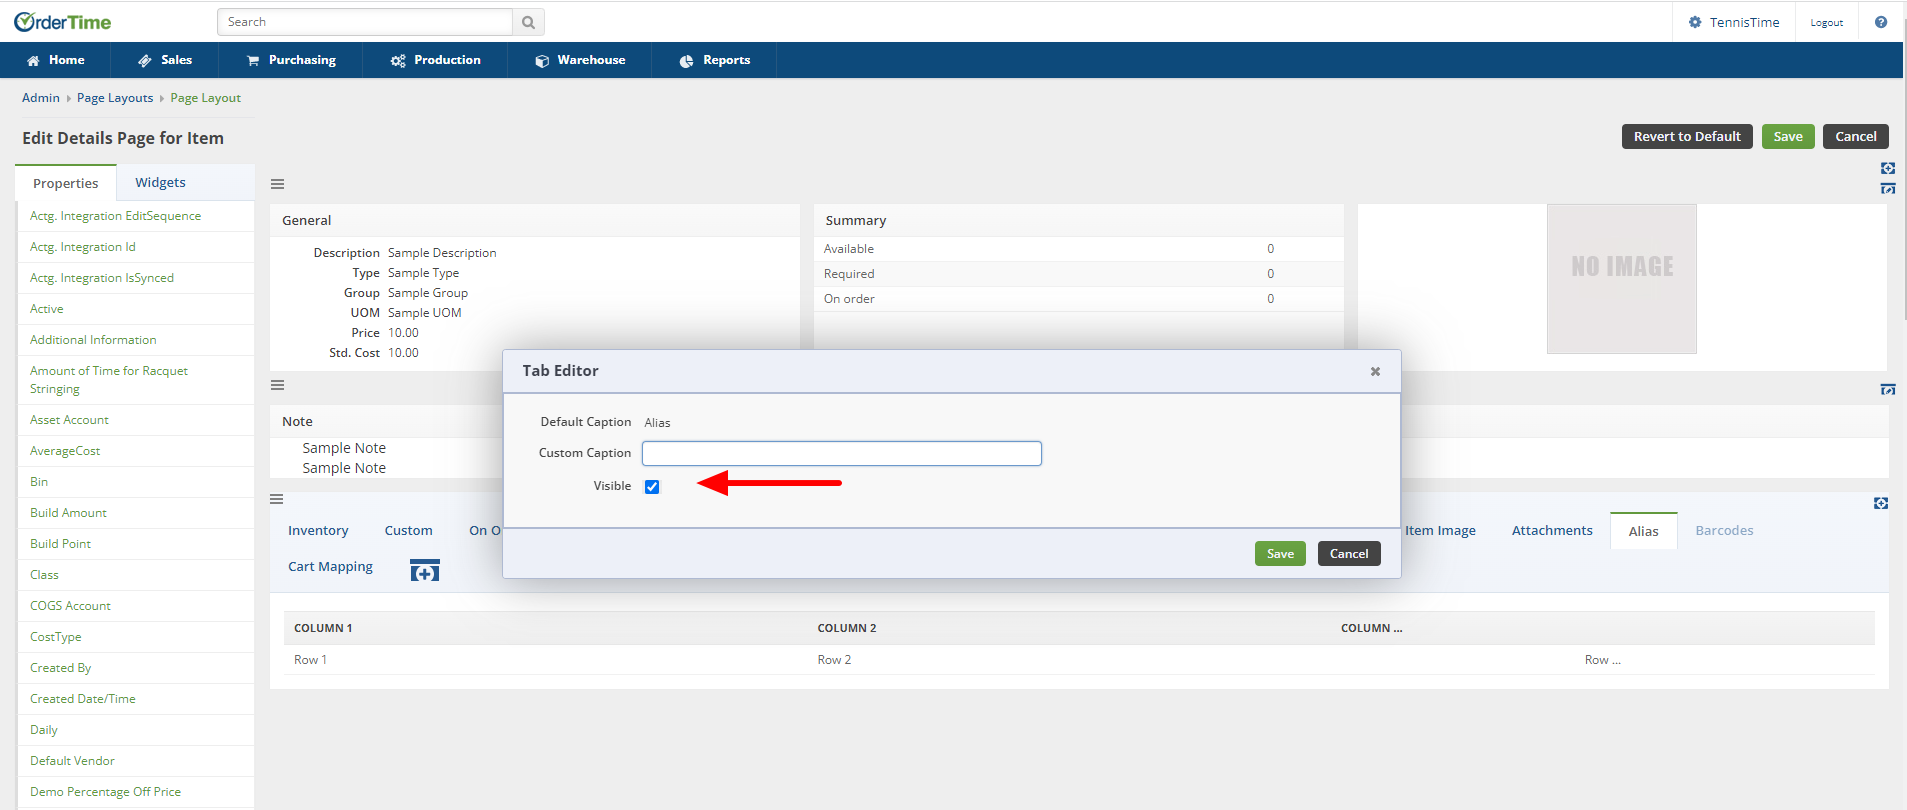
If you do not see the Alias tab you need access Page Layout from the Admin screen and select Item Details in order to make the Alias tab "Visible".
- Should the Alias tab not be reflected in your Item List, go to Admin and within the Settings column you will select Page Layout.

- Selecting Page Layouts will bring you to the Edit Layouts screen where you will select the Item Details the Edit icon towards the right side of the screen.

- You will locate the Alias tab which should be "grayed out" and click on the tab. This will open a window with an Edit button which you will click.
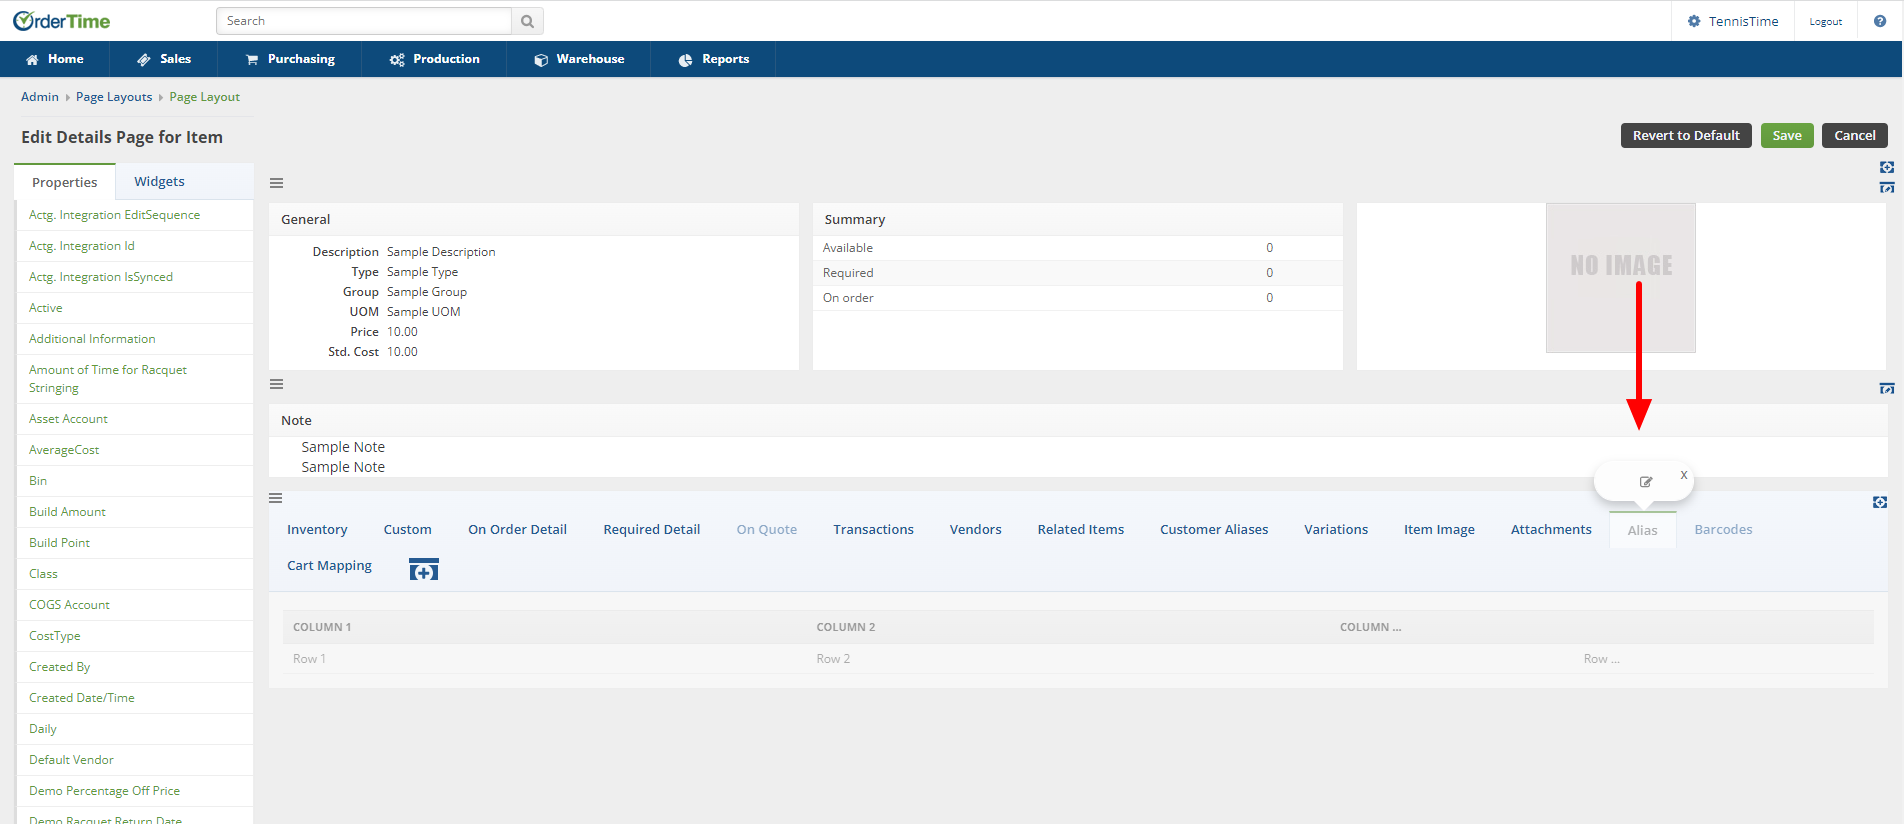
- The Tab Editor window will appear and you must check the Visible box in order for the Alias tab to become visible within the Item screen. Once checked, click the Save button.
- With the Alias tab now being visible select the green Add button towards the right hand side of the screen.
- This will open the Item Alias window.
- You may input your Alias No., the Company, the Price and any needed comments.
- Click the green Save button towards the bottom right hand corner of the window.
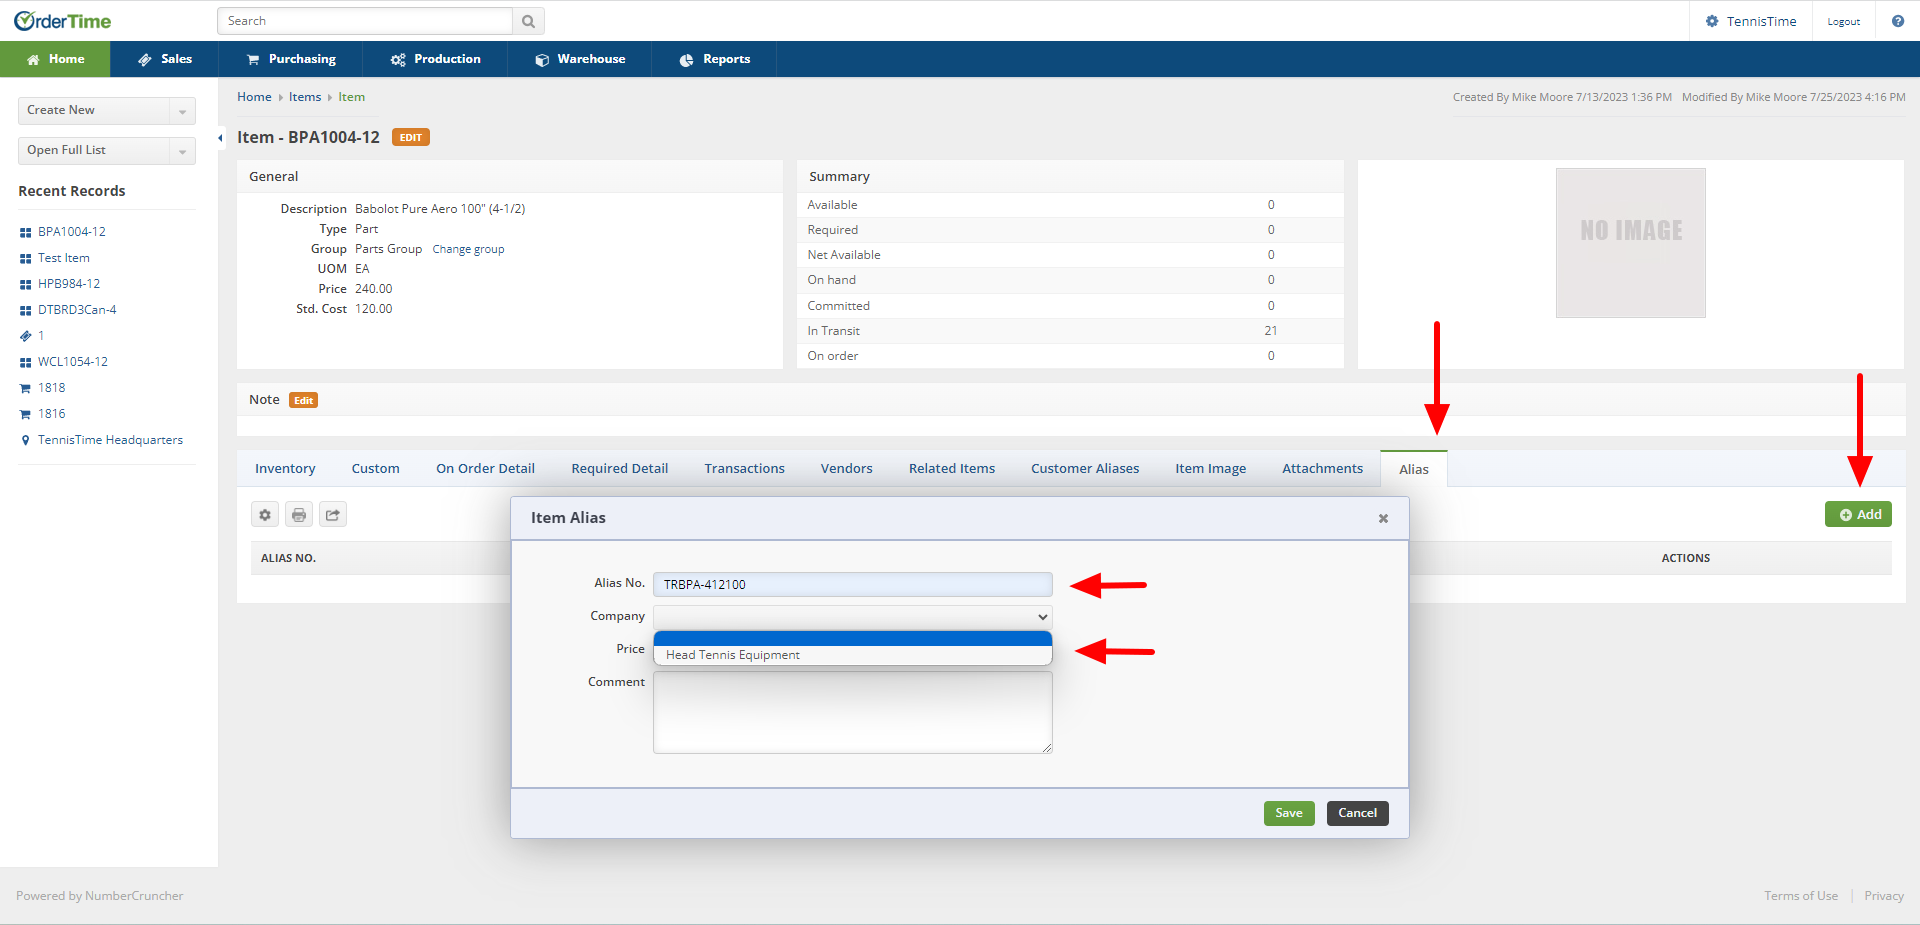
- The Alias tab will now reflect the Information associated with a manufacturer.


